Operation
Runco CL-810 Series Owner’s Operating Manual 59
PRE
L
IMINAR
Y
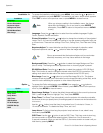
•H Threshold/V Threshold/Chroma Threshold: Set these to +11 or higher to
activate the enhancement controls described above. Generally, the higher the
threshold, the more noticeable the enhancements you make will be.
RVR Adjust: Use the RVR Adjust control to increase or decrease the Reflectance Volume
Regulation setting. RVR lets you control the aperture or iris size (the physical opening
through the lens; similar to an “f-stop” on a camera). Doing so allows you to optimize
brightness and contrast according to the amount of ambient light in the viewing area.
Use a higher setting for rooms with lots of ambient light. Use a lower setting for more
“theater-like” viewing conditions (little or no ambient light).
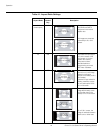
Image Over Scan: Image Over Scan pushes the outside edge of the active picture area
of the video signal out beyond the edge of the display area.
Some television programs are produced based on the assumption that older television
sets may not display the outer edges of the broadcast picture area. Over scan effectively
trims away these inactive, outer edges and enlarges the remaining portion of the image to
fill the display area.
Use the on-screen slidebar to select the desired amount of over scan.
For HDTV, DVDs and other video sources, Image Over Scan is generally not necessary or
desirable.
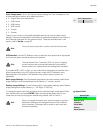
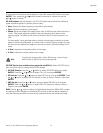
Image Shift: The Image Shift menu allows you to precisely center the image on the
screen. (These controls are available only with a 480i source signal.)
• Horizontal: This control moves the image right or left within the area of available pixels.
• Vertical: This option moves the image up or down within the area of available pixels.
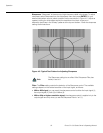
Amplitude Adjust: The Amplitude Adjust menu allows you to fine-tune the
curently-selected image aspect ratio by stretching it horizontally or vertically, in small
increments. This can be useful if your projector is equipped with an anamorphic lens.
The Horizontal control adjusts the image width while keeping the height constant.
Similarly, the Vertical control adjusts the image height while keeping the width constant.
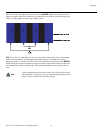
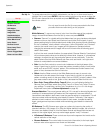
Horizontal Masking (CineWide CL-810 versions only): To achieve the proper image
geometry with the secondary anamorphic lens, select Horizontal Masking from the Set
Up
menu. Then, use the
or button to change the native aspect ratio of the display, in
small increments.
1. To adjust the image position with a 480p or higher-resolution
source, use the
PC & HD Adjust controls in the Option menu,
described on page 57.
2. The values shown represent where the approximate center of the
image lies in relation to the total number of pixels available
horizontally or vertically. This varies widely according to the
signal; watch the image while adjusting.
Note


