


Installation
24 Runco VX-22d Installation/Operation Manual
PRE
L
IMINAR
Y
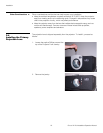
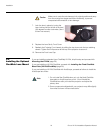
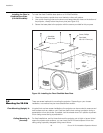
7. Lock the lens in place by turning the
Lens Locking Nut (to the left of the lens)
180 degrees counter-clockwise. (Use a
6.0mm hex wrench.)
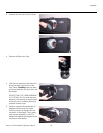
8. Replace the Lens Cavity Front Cover.
9. Reattach the Projector Front Jewelry by sliding the top down onto the two retaining
dowels. Tighten the Phillips screw at the top of the projector to secure it.
10. Remove the Front Lens Cap.
3.5
Installing the Optional
CineWide Lens Mount
If you are installing a standard (non-CineWide) VX-22d, skip this step and proceed with
Mounting the VX-22d (page 28).
If you are installing a VX-22d/CineWide, proceed with Installing the Fixed CineWide
Base Plate (VX-22d/CineWide) (page 28).
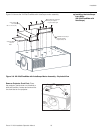
If you are installing a VX-22d/CineWide with AutoScope, proceed as follows to install the
AutoScope lens motor.
Make sure to route the wire harness in its original position and away
from the moving lens stages and Motor Assembly, to prevent
unexpected disconnection or lens damage.
Caution
1. Do not install the CineWide lens yet, only the fixed CineWide
base plate or AutoScope lens motor. You will install the
CineWide lens after you install the projector and adjust the
primary lens.
2. Some components shipped with your projector may differ slightly
from what is shown in these instructions.
Note