


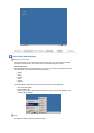
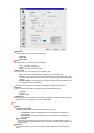
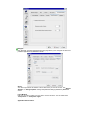

It is possible to select/create a new/existing mount point using the Control Centre dialog boxes
itself. The process is described here along with figures.
z
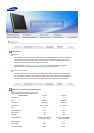
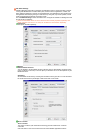
First the IP address of the Samba server is given.
z
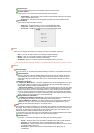
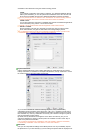
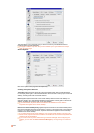
It automatically lists all the directories shared on that Samba server which can be seen
as shown in the figure below.
z
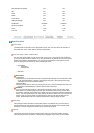
Then the directory where the share has to be mounted is selected.
z
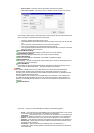
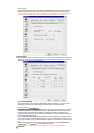
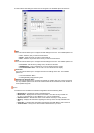
Then a new empty directory is created and named accordingly.
z
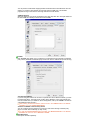
Then the folder created is selected and then it becomes the new mount point, where the
Samba share directory will be mounted.
Save Samba Mount Settin
g
s
Enter a name to save the Samba settings and click "Save" to save the settings.
Load Samba Settin
g
s
Select the saved settings to be loaded. Click "Load" to load the settings.
Delete Samba Settin
g
s
Select the saved settings to be deleted. Click "Delete" to delete the settings.
Modif
y
Samba Mount
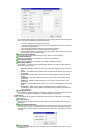
Click "Modify..." to open the "Modify Samba Mount" dialog-box to modify an existing Samba
Mount with following options
z
Directory: -
Modify the directory name as it is exported by the Windows or Unix samba
host.
z
Server: -
The NetBIOS name (Windows host) or host name/IP address (Unix host) is to
be modified.
z
Mount Point: -
Modify "Mount Point" where the share should be mounted in local file
system.
z
User Name: -
Enter the modified user name of your account on the Windows or Unix
samba host.
z
Password: -
Enter the modified password of your account on the Windows or Unix
samba host.
z
Domain: -
Enter modified domain name of your account on the Windows or Unix samba
host.
z
Permission: -
Modify the permission for the Samba Mount to be "Read-Only" or
"Read/Write", based on the properties of the Samba share provided by the Windows or
Unix samba host.
Delete Samba Mount
Click "Delete" to open the "Remove Samba Mount" dialog-box with the text message "Are you
sure you want to delete Samba Mount ". The following options are provided.
VNC Server
This menu allows you to configure a VNC Server on the STC from a VNC Client. The available
options here are
No authentication
Enabling this option allows anonymous VNC Client to connect to the Thin Client acting as a
VNC Server.
V
NC Password Authentication
Enabling this option allows only authenticated VNC Client to connect to the Thin Client acting
as a VNC Server. For this, a password has to be set or modified for authentication purpose.
The Client has to enter this password along with proper user name to successfully connect to
the server.
Launch at Startup
Enabling this option ensures that the Thin Client can act as a VNC Server from the moment
the OS boots up.