52 _Faxing
Changing the default document settings
The fax options, including resolution and darkness, can be set to the most
frequently used modes. When you send a fax, the default settings are used
if they are not changed by using the corresponding button and menu.
1. Press Fax.
2. Press Menu until Fax Setup appears on the bottom line of the display
and press OK.
3. Press the left/right arrow until Change Default appears and press OK.
4. Press OK when Resolution appears.
5. Press the left/right arrow until the resolution you want appears and press
OK.
6. Press the left/right arrow until Darkness appears and press OK.
7. Press the left/right arrow until the darkness you want appears and press
OK.
8. Press Stop/Clear to return to ready mode.
Printing sent fax report automatically
You can set the machine to print a report with detailed information about the
previous 50 communication operations, including time and dates.
1. Press Fax.
2. Press Menu until Fax Setup appears on the bottom line of the display
and press OK.
3. Press the left/right arrow until Auto Report appears and press OK.
4. Press the left/right arrow until On appears and press OK.
5. Press Stop/Clear to return to ready mode.
Setting up Address Book
You can set up Address Book with the fax numbers you use most
frequently. Your machine provides you with the following features for setting
up Address Book:
• Speed/Group dial numbers
Speed dial numbers
You can store up to 200 frequently-used fax numbers in speed dial
numbers.
Registering a speed dial number
1. Press Fax.
2. Press Address Book until New & Edit appears on the bottom line of
the display and press OK.
3. Press OK when Speed Dial appears.
4. Enter a speed dial number between 0 and 199 and press OK.
If an entry is already stored in the number you choose, the display
shows the name to allow you to change it. To start over with another
speed dial number, press Back.
5. Enter the name you want and press OK.
For details on how to enter alphanumeric characters, see page 27.
6. Enter the fax number you want and press OK.
7. Press Stop/Clear to return to ready mode.
Editing speed dial numbers
1. Press Address Book until New & Edit appears on the bottom line of
the display and press OK.
2. Press OK when Speed Dial appears.
3. Enter the speed dial number you want to edit and press OK.
4. Change the name and press OK.
5. Change the fax number and press OK.
6. Press Stop/Clear to return to ready mode.
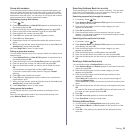
Using speed dial numbers
When you are prompted to enter a destination number while sending a
fax, enter the speed dial number at which you stored the number you
want.
• For a one-digit (0-9) speed dial number, press and hold the
corresponding digit button on the number keypad.
• For a two- or three-digit speed dial number, press the first digit
button(s) and then hold down the last digit button.
You can also search through memory for an entry by pressing Address
Book. See page 53.
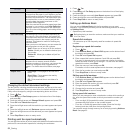
Discard Size When receiving a fax containing pages as long as
or longer than the paper in your machine, you can
set the machine to discard a specific length from
the end of the received fax. The machine will print
the received fax on one or more sheets of paper,
minus the data that would have been on the
specified discard segment.
When the received fax contains pages larger than
the paper in your machine, and Auto Reduction
has been turned on, the machine will reduce the
fax to fit on the existing paper, and nothing will be
discarded.
Junk Fax Setup This setting may not be available depending on
your country. Using this feature, the system will
not accept faxes sent from remote stations whose
numbers are stored in the memory as junk fax
numbers. This feature is useful for blocking any
unwanted faxes.
When you turn on this feature, you can access the
following options to set junk fax numbers.
•Add:Allows you to set up to 20 fax numbers.
• Delete: Allows you to delete the desired junk
fax number.
• Delete All: Allows you to delete all junk fax
numbers.
DRPD Mode This mode enables a user to use a single
telephone line to answer several different
telephone numbers. In this menu, you can set the
machine to recognize which ring patterns to
answer. For details about this feature, see page
48.
Duplex Print
• Long Edge: Prints pages to be read like a
book.
• Short Edge: Prints pages to be read by
flipping like a note pad.
• Off: Prints received fax on one sides of a
paper.
OPTION DESCRIPTION
Before beginning to store fax numbers, make sure that your machine
is in Fax mode.


