


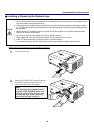

2. Installation and Connections
26
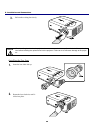
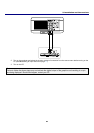
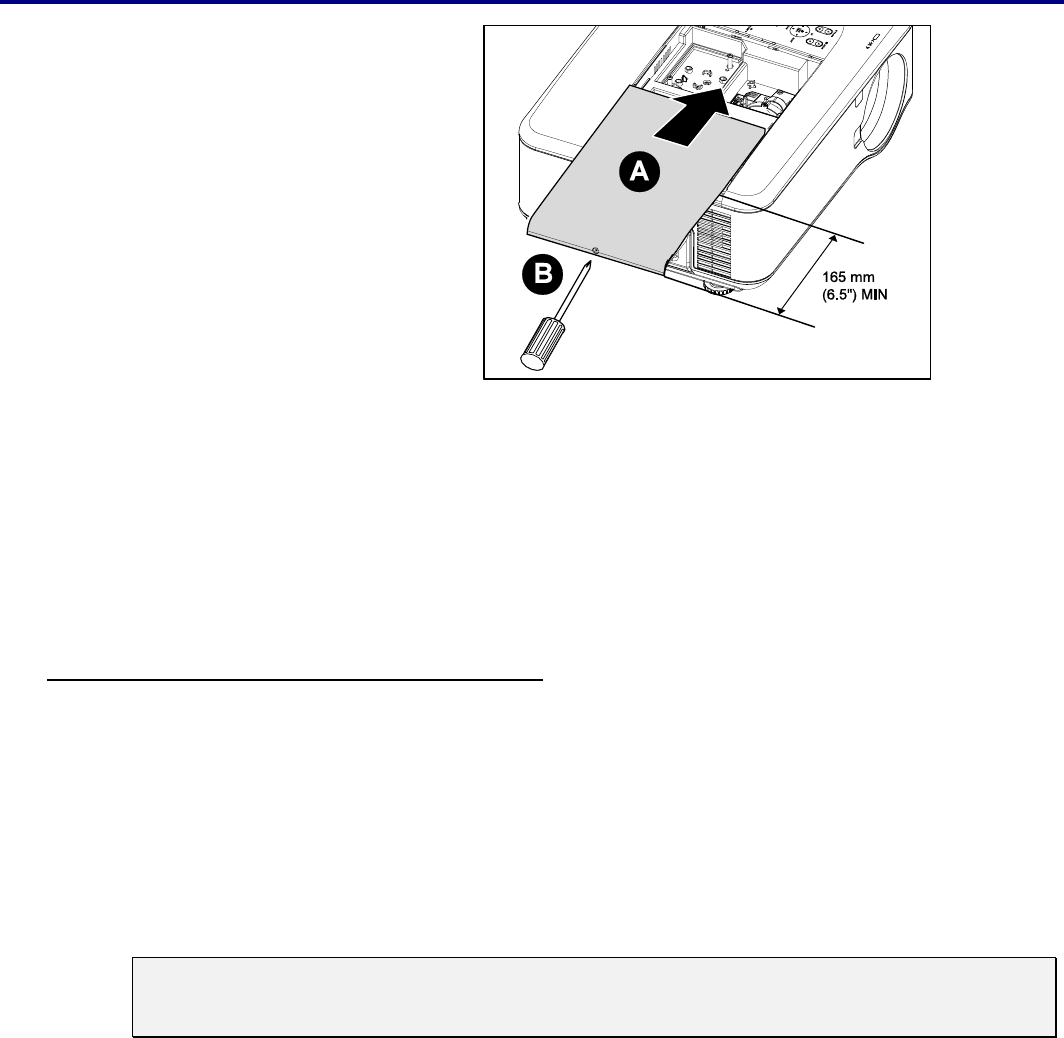
7.
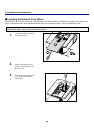
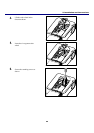
Align the lamp cover (A) with
the arrow mark on the cabinet
and slide it into place.
8.
Secure the captive screw (B).
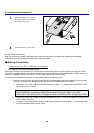
Storing Unused Color Wheel:
Keep the unused color wheel in the zipper bag in which the 6-segment color wheel (not supplied) was packaged.
This bag prevents dust from falling or collecting on the color wheel.
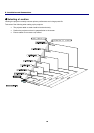
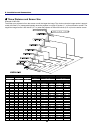
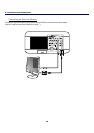
s Making Connections
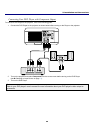
Connecting Your PC or Macintosh Computer
Enabling the computer’s external display
Displaying an image on the notebook PC’s screen does not necessarily mean it outputs a signal to the projector. When
using a PC compatible laptop, a combination of function keys will enable/disable the external display. Usually, the combi-
nation of the Fn-key along with one of the 12 function keys activates the external display.
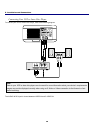
To connect a PC or Macintosh computer to the projector, refer to the following guide.
1. Connect a computer to the projector through one of the three available input data connections before turning
on the PC or the projector. The best signal order (from best to least suitable) is as follows:
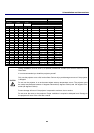
Computer 3 in (see item 1, r Terminal Panel Features on page 10) is a digital signal and offers the best
connection to your computer.
Note:
The DVI (DIGITAL) connector (COMPUTER 3) accepts VGA (640 x 480), 1152 x 864,
XGA (1024 x 768), SXGA (1280 x 1024@up to 60Hz) and SXGA+(1400 x 1050 @ up to 60Hz).
Computer 2 in (see item 17, r Terminal Panel Features on page 10) is an analog signal; use a DSUB-15
cable-to-5BNC connection.
Computer 1 in as shown below (see item 18, r Terminal Panel Features on page 10) is an analog signal
that uses a standard RGB computer cable.