


3
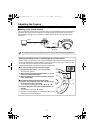
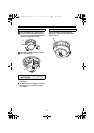
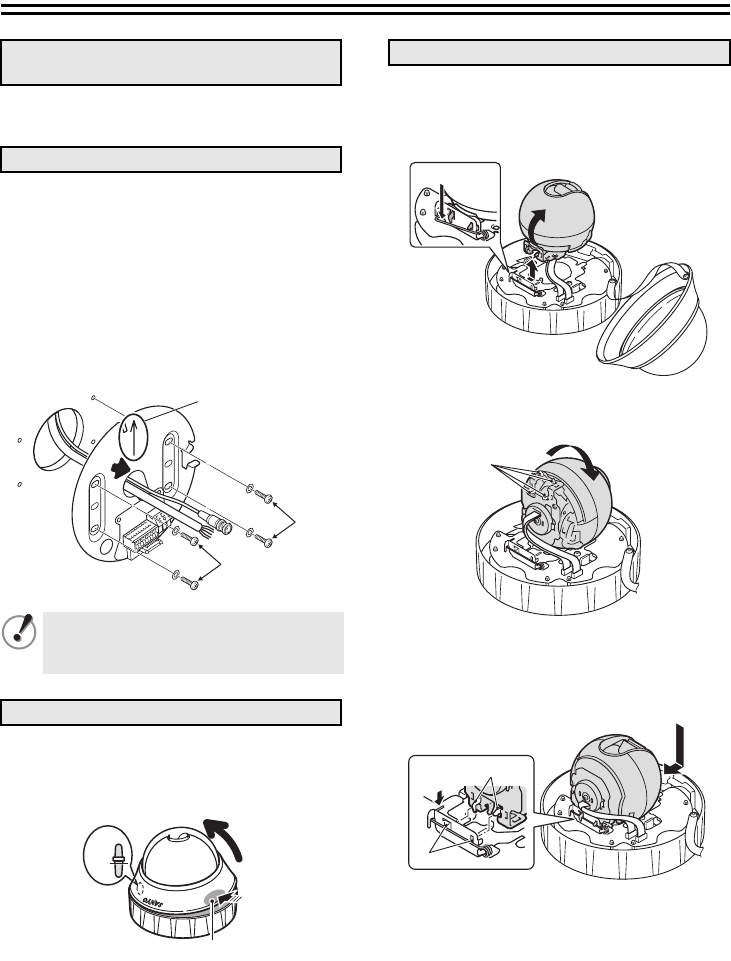
Installing on the Wall
See “Installing on the Ceiling” (see page 1).
1
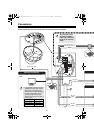
Pass the connection cables through the
cable hole on the base plate.
2
Set the base plate on the wall with the
arrow (↑) pointing upward. Then, secure
the base plate using the screws and
washers (B) (4 places).
• Length: 35 mm or more
• Diameter: 3.5 to 5.0 mm
• Height of screw head: 5 mm or less
(washer included)
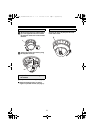
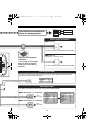
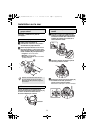
While pressing down the cabinet section (D)
on the opposite side of the rib mark (C),
open the dome cover in the arrowed
direction.
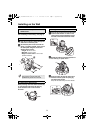
1
Push the spring (E) and set free the hooks
from the base chassis. Lift and turn the
camera in the arrowed directions so that
the back of the camera becomes visible.
2
Rotate the camera so that the position of
the locks (F) is upside down.
3
Align the locks (G) with the slots (H) on
the base chassis, push the spring (J),
and mount the camera.
Keep the flat cable away from the chassis.
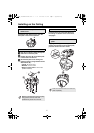
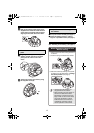
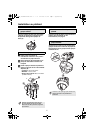
1. Remove the base plate from the
camera unit
2. Install the base plate
Make sure to tighten the screws properly.
Using screws of sizes other than
specified may cause the unit to fall.
3. Remove the dome cover
B
B
2
D
C
Push
4. Change the camera position
E
F
J
H
G
L5BM2_XE(INSTALLATION).book 3 ページ 2006年7月6日 木曜日 午後2時24分