


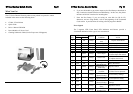
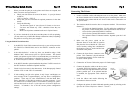
Route Paper under the Sensor
CT4xx Series Quick Guide Pg 6
1. Remove power from the printer by placing the Power
Switch in the OFF (0) position.
2. Open the Top Cover by pressing on cover
release points located on each side of the
printer.
3. Release the Print Head Assembly by pressing the Head
Latch to the rear. This allows the assembly to rotate
upwards to the left allowing easy access for media
routing. Rotate the assembly until it is vertical.
4. With the Print Head Assembly in the up position,
press the Paper Guide Release while adjusting the
Paper Guides until they allow a media roll to fit
between them. A millimetre scale is moulded into
the case to provide a guide when making the
adjustment. The Paper Guides are centre justified and interact with each
other so that each moves an equal distance.
5. Make sure the Roll Holders are in the released
position. If they are not, lift up on each one and they
will snap to the open position.
6. Unwind approximately 12” of label material from the
roll. The labels should be wound face-out (printing
side to the outside of the roll). Drop the roll in
between the Paper Guides so that the labels come off
the top of the roll. The Paper Guides will automatically position the Roll
Holders to suspend the roll.
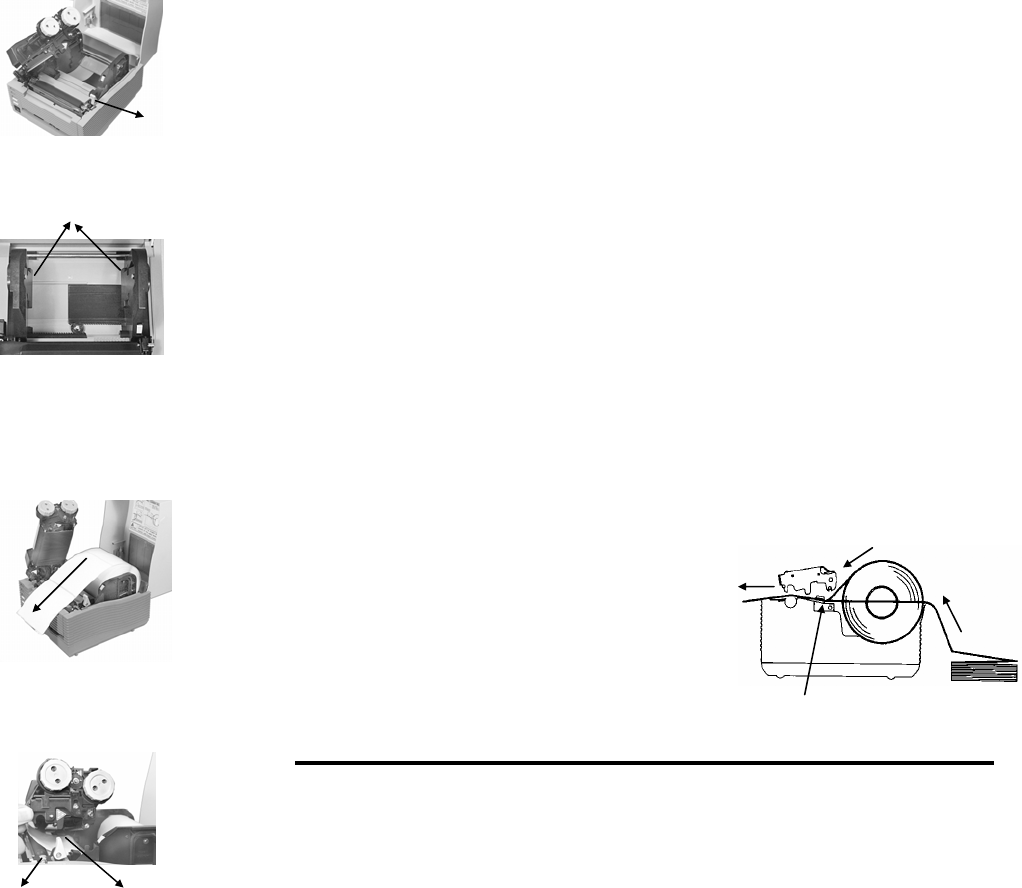
7. Route the label material through the Paper Sensor
Assembly and over the Platen. Note that the Sensor is
part of the left Label Roll Guide so that the Paper
Sensor is always positioned in the same location relative
to the left edge of the label.
8. Close and latch the Print Head Assembly.
9. Press the LINE key so that the printer is in the OFF LINE mode and then
press the FEED key. The label should advance to the next index (label gap
or eye-mark) position.
CT4xx Series Quick Guide Pg 7
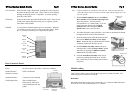
Fanfold Media
1. Place the fanfold media behind the printer with the printing surface up.
2. Open the Top Cover by pressing on cover release points located on each
side of the printer. This releases the cover latch and allows it to swing
upwards on the rear mounted hinge points.
3. Carefully break out the Fanfold Access Panel from the back of the Top
Cover.
4. Release the Print Head Assembly by pressing the Head Latch to the rear.
This allows the assembly to rotate upwards to the left allowing easy access
for ribbon routing. Rotate the assembly until it is vertical.
5. With the Print Head Assembly in the up position, press the Paper Guide
Release while adjusting the Paper Guides until they allow a media to fit
between them. A millimetre scale is moulded into the case to provide a
guide when making the adjustment. The Paper Guides are centre justified
and interact with each other so that each moves an equal distance.
6. Route the label material through the Sensor Assembly and over the Platten.
7. Close and latch Print Head Assembly.
8. After loading the ribbon and media, it is
recommended that you run a Test Print to
make sure the labels and ribbon (for
CT4xxTT only) are correctly loaded.
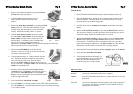
Operator Panel
POWER Green LED, illuminated when power is applied.
ERROR Red LED, illuminated when there is a system fault such as an open
print head.
ON LINE Green LED, illuminated when the printer is ON LINE and ready to
receive data. The printer is placed ON LINE and OFF LINE by
toggling the ON LINE key.
Platten Paper Sensor
Head Latch Paper Sensor
Paper Guide
Release
Roll Holder
Millimetre
Scale