Telephone Service: Mount the Battery Pack on a Wall, Continued
Wall Mounting Instructions
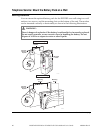
Complete these steps to mount the battery pack to the wall.
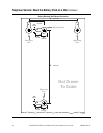
1. Using a drill with a 3/16-in. bit, drill two holes in the wall as follows:
• To mount the cable modem vertically, drill the holes at the same height
and 4 inches apart.
• To mount the cable modem horizontally, drill the holes at the same height
and 6 inches apart.
Note: The graphic on page 42 illustrates the location of the mounting holes
on the back of the battery pack.
2.
Are you mounting the battery pack into a drywall or concrete surface where a
wooden stud is not available?
• If yes, drive the anchor bolts into the wall, and install the mounting
screws into the anchor bolts leaving a gap of about 1/4-in. between the
screw head and the wall. Then, go to step 4.
• If no, go to step 3.
3.
Install the mounting screws into the wall leaving a gap of about 1/4-in.
between the screw head and the wall. Then, go to step 4.
4.
Verify that no cables or wires are connected to the battery pack or to the cable
modem.
5.
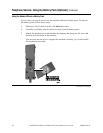
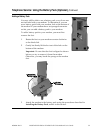
Lift the cable modem into position. Slip the large end of both mounting slots
(located in the back of the battery pack) over the mounting screws, then slide
the battery pack down until the narrow end of the keyhole slot contacts the
screw shaft.
Important: Verify that the mounting screws securely support the battery
pack and modem before you release the unit.
6. Go to Telephone Service: Install the Cable Modem, next in this chapter.
4004041 Rev B WebSTAR DPX2203 or EPX2203 VoIP Cable Modem User’s Guide 43


