


Managing Sidewinder self-signed certs
Configuring Sidewinder for Soft-PK Clients 3-5
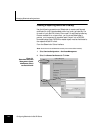
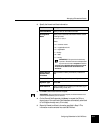
3.
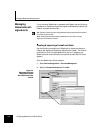
Specify the following Firewall Certificate settings.
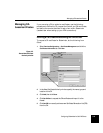
4. Click Add to add the certificate to the Certificates list.
5. Click Close to return to the Firewall Certificate window.
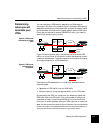
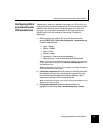
Export the firewall
certificate (for later transfer
to each client system)
6.
Click Export and save the firewall certificate (containing the public key)
to a file. Add a
.pem extension (for example, "firewallcert.pem").
7. Click OK when done.
Once you have finished creating the firewall certificate, you will
typically copy it to an MS-formatted diskette for distribution to each
remote Soft-PK client. You can do this using the
mcopy command. For
example:
% mcopy -t filename a:filename
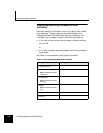
Field Setting
Certificate Name Specify a name for the firewall certificate.
Distinguished
Name
Specify a set of data that identifies the firewall. Use the
following format:
cn=,ou=,o=,l=,st=,c=
where:
cn = common name
ou = organizational unit
o = organization
l = locality
st = state
c = country
IMPORTANT: The syntax for this field is very
important. The above entries must be separated
by commas, and contain no spaces. In addition,
the order of the specified distinguished name fields
must match the desired order to be listed in the
certificate.
E-Mail Address,
Domain Name,
IP Address
Optional fields to identify information (in addition to
DN).
Submit to CA Select Self Signed.
Signature Type Select RSA.