


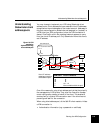


Managing Sidewinder self-signed certs
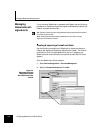
Configuring Sidewinder for Soft-PK Clients 3-7
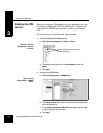
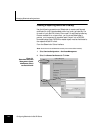
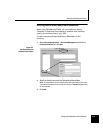
3.
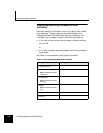
Specify the following Remote Certificate settings.
4. Click Add to add the certificate to the Certificates list.
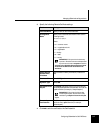
Field Setting
Certificate Name Specify a name for the remote certificate.
Distinguished
Name
Specify a set of data that identifies the client. Use the
following format:
cn=,ou=,o=,l=,st=,c=
where:
cn = common name
ou = organizational unit
o = organization
l = locality
st = state
c = country
IMPORTANT: The syntax for this field is very
important. The above entries must be separated
by commas, and contain no spaces. In addition,
the order of the specified distinguished name fields
must match the desired order to be listed in the
certificate.
E-Mail Address,
Domain Name,
IP Address
Optional fields to identify information (in addition to
DN).
Submit to CA Select Self Signed.
Signature Type Select RSA.
Generated Private
Key File
Click Browse and specify where you want to save the
private key associated with this certificate. You must use
a .pk1 extension (for example, "clientprivate.pk1").
IMPORTANT: The private key files must be
created as
.pk1 objects. The conversion utility
used starting in Step 6 will not work with
.pk8
objects.
Generated
Certificate File
Click Browse and specify where you want to save this
certificate. Use a .pem extension (for example,
"clientcert.pem").