


6
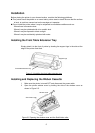
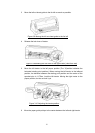
3 Pull the Sub friction roller by gripping the center area of the unit by your
forefingers. Then lift it up until it is positioned upwards towards the top of the
printer as shown in Figure 2-5.
4 If necessary, move and centre the print head carefully by hand.
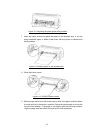
5 Hold the ribbon cartridge with the knob facing upwards and turn the ribbon knob
in the direction shown by the arrow to take up any slack in the ribbon.
6 To install the ribbon cartridge, hold it with both hands, with the ribbon facing
down as shown if Figure 2-6.
Figure 2-6 Installing the ribbon cassette
Make sure of the following:
When you look at the print head you will find a small piece of black plastic
on the thin metal sheet of the ribbon guide. Make sure that the ribbon goes
under the piece of plastic.
Position the ribbon cartridge with the tabs on its case over the slots inside
the printer case.
With the ribbon cartridge and ribbon correctly positioned, gently push the
cartridge towards the back of printer until it clicks into place.
7 Move the print head from side a few times to make sure the ribbon slides into
the ribbon guides.
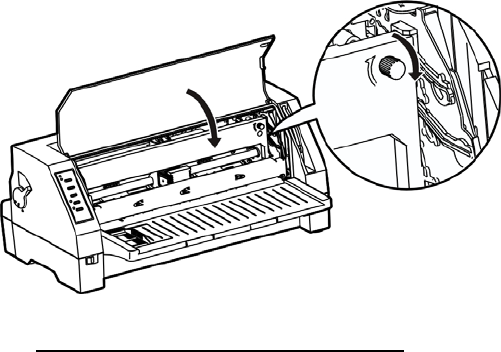
8 Having installed the ribbon, lower the sub friction roller and gently push it shut
until you hear a click. Then close the window cover.
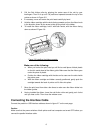
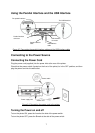
Connecting the Interface Cable
Connect the parallel or USB interface cable as shown in figure 2-7 on the next page:
Caution
Make sure that the power switches of both printer and host computer are turned OFF before you
connect the parallel interface cable.