Preparing the central unit for use
8 | ADN CU1
Preparing the central unit for use
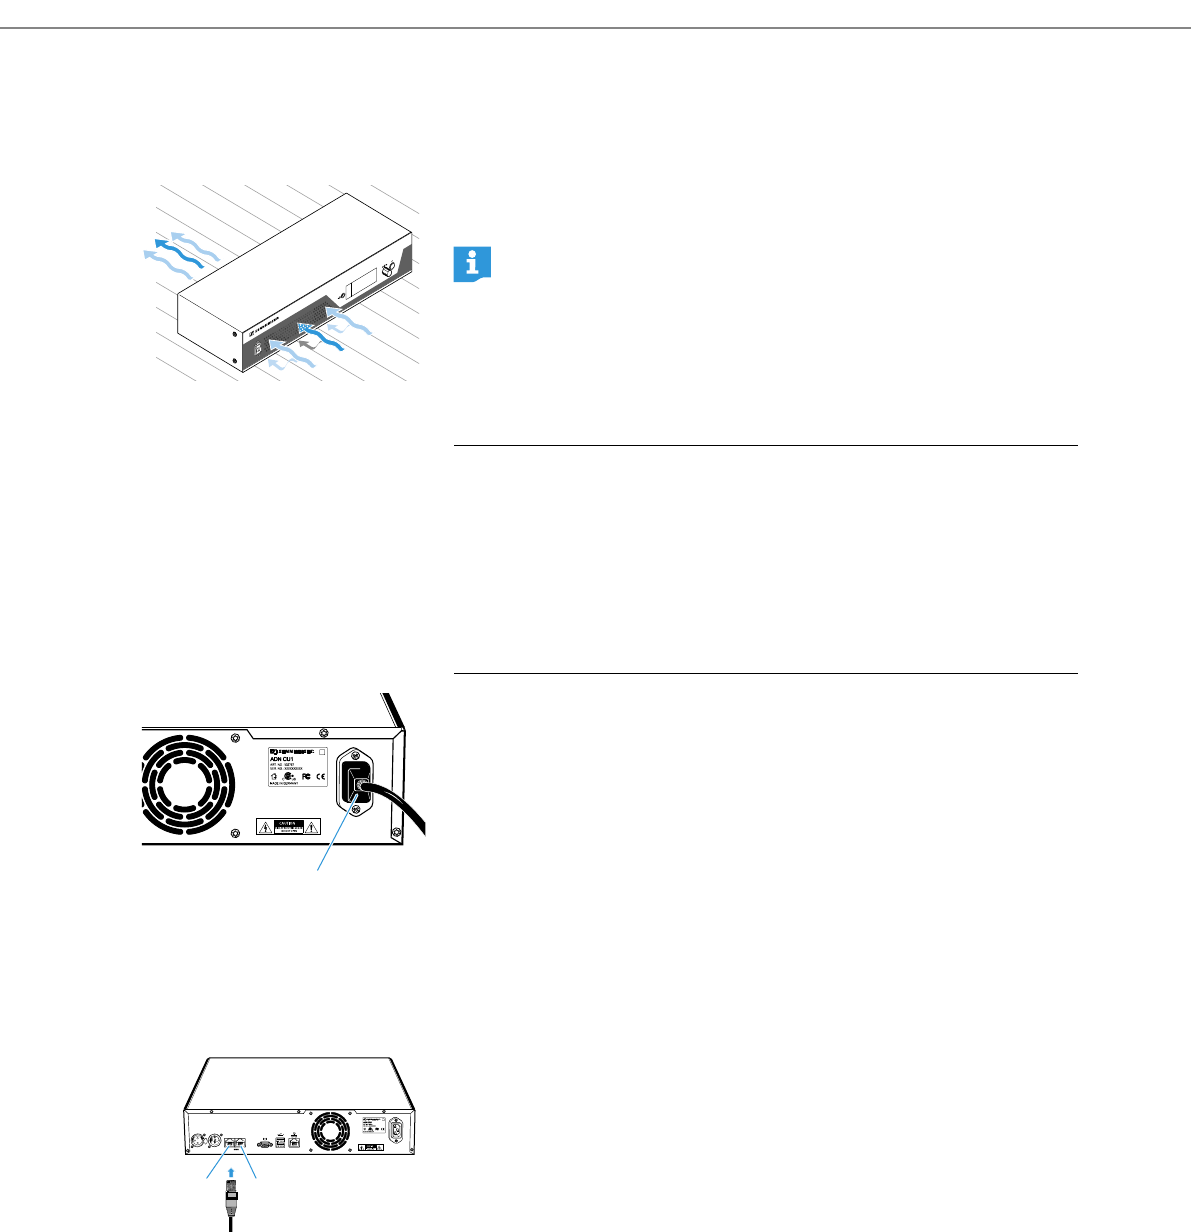
Setting up the central unit on a flat surface or mounting it into a rack
̈ Make sure that the air vents are not covered or blocked.
̈ Place the central unit on a flat surface as shown.
Connecting the central unit to the mains
̈ First connect the mains cable to the mains socket D.
̈ Connect the mains cable to the mains.
The central unit is now ready for operation.
Setting up the conference system
Connecting the conference units to the central unit
You can connect up to 15 conference units to each of the central unit’s connection
sockets PORT II 8 or PORT I 9. The maximum number of conference units that can
be used in one cable string depends on the overall cable length connected to a port
(see page 7).
The following describes the procedure for one cable string. If necessary, repeat
these steps for a second cable string.
̈ Place the conference units at the corresponding seats.
̈ Put out a sufficient number of system cables in the required lengths.
̈ If necessary, calculate the maximum length of the cable string in order to
ensure that all conference units connected in the string are supplied with
a voltage of at least 35 V (see page 7).
For information on how to mount the central unit into a 19” rack, refer to
the detailed instruction manual.
CAUTION
Product damage due to unsuitable mains cables or power outlets!
An unsuitable power supply can damage the product.
̈ Only use the recommended mains cable (see page 4) for connecting the product
to the mains.
̈ Only use multi-outlet power strips or extension cables with protective ground
contacts.
̈ Only use mains cables with a 3-pin connector.
100-240V~
50/60Hz 240W
D
IN –– AUDIO –– OUT
PORT II PORT I
100-240V~
50/60Hz 240W
2x 52.8V 1.75A
8 9
KA_ADN-CU1_535358_0211_SP13.book Seite 8 Dienstag, 1. Februar 2011 12:43 12
