-40
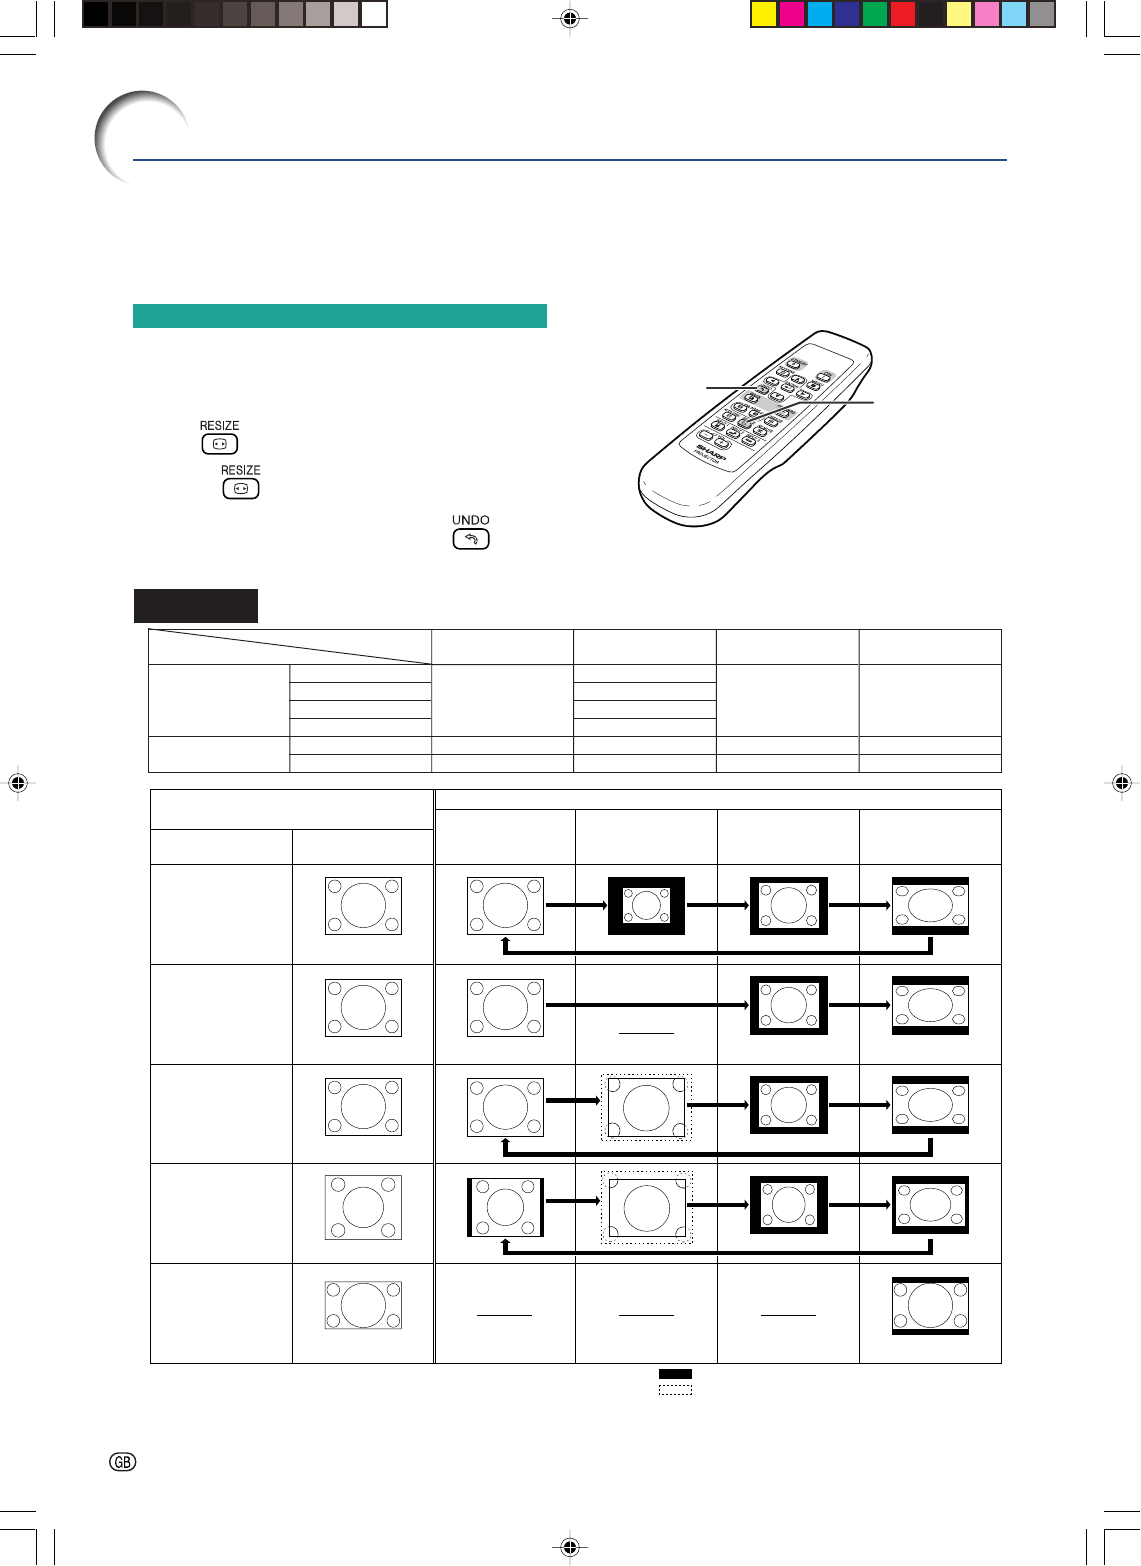
Picture Display Mode
Switching the Picture Dis-
play Mode
Press .
•Pressing changes the display as shown on
pages 40 and 41.
•To return to the standard image, press
while
“RESIZE” is displayed on the screen.
This function allows you to modify or customize the picture display mode to enhance the
input image. Depending on the input signal, you can choose “NORMAL”, “DOT BY DOT”,
“BORDER” or “STRETCH” image.
COMPUTER
STRETCH
Projects 16:9 image
evenly over entire screen
(top/bottom blank bands).
Output screen image
Input Signal
Image type
NORMAL
Projects a full screen
image while maintaining
the aspect ratio.
DOT BY DOT
Projects the original
resolution signal
of the image.
BORDER
Projects 4:3 image fully
in STRETCH (the following
column) image.
4:3 aspect ratio
4:3 aspect ratio
4:3 aspect ratio
5:4 aspect ratio
16:9 aspect ratio
: Cutout area on which images cannot be projected.
: Area where the signals are off screen.
*
Mode for projecting an image with the original aspect ratio without cutting any portions.
***
**
**
**
*
Computer
Resolution
lower than
XGA
XGA
Resolution
higher than
XGA
1280 × 720
SXGA (1280 × 1024)
4:3 aspect ratio
Other aspect ratios
SVGA (800 × 600)
XGA (1024 × 768)
SXGA (1280 × 960)
SXGA+ (1400 × 1050)
SXGA (1280 × 1024)
1280 × 720
1024 × 768
960 × 768
—
800 × 600
—
1280 × 960
1400 × 1050
1280 × 1024
—
768 × 576
720 × 576
—
1024 × 576
960 × 576
1024 × 576
NORMAL DOT BY DOT BORDER STRETCH
RESIZE
button
UNDO
button
PG-A20X_E_PDF_P40_50.p65 03.4.23, 9:58 AM40


