


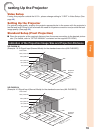


26
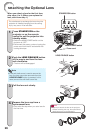
Attaching the Optional Lens
When you attach a lens for the fi rst time,
skip steps 1 to 3. (When you replace the
lens, start from step 1.)
Do not attempt to exchange the lens when the
projector is installed hanging from the ceiling.
Injury may occur if the lens falls.
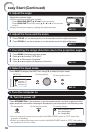
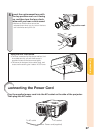
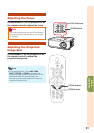
1
Press STANDBY/ON on the
projector or on the remote
control to put the projector into
standby mode.
Switch the MAIN POWER switch on the
projector to “OFF”.
Disconnect the power cord and unplug the
power cord from the AC socket after the
cooling fan stops.
2
Push the LENS RELEASE button
all the way in and turn the lens
anti-clockwise.
The lens will be disengaged.
If the anti-theft screw is used to secure the
lens, the lens cannot be removed when the
LENS RELEASE button is pressed. In this
case, remove the anti-theft screw fi rst.
•
Note
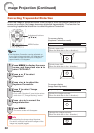
3
Pull the lens out slowly.
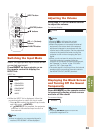
4
Remove the lens cap from a
replacement lens.
Start with this step when you set a lens for
the fi rst time.
•
•
•
•
STANDBY/ON button
Power cord
MAIN POWER switch
STANDBY/ON button
Power cord
MAIN POWER switch
1
LENS RELEASE buttonLENS RELEASE button
2
3
4
Info
If you try to attach the lens to the projector
without removing this cap, the optional lens
attachment part can be damaged.
•