


Initial setup using Linux
By default, your SnapGear appliance as shipped does not have any IP addresses
configured. When the SnapGear appliance is powered on, if it has no LAN IP address all
the front panel LEDs except Power will flash (except on LITE+ and LITE2+). The LEDs
remain flashing until a LAN IP address is acquired.
The first setup task is to add an IP address in the SnapGear appliance using either
DHCP or BOOTP. You may use an existing local DHCP/BOOTP server, set up a new
local DHCP/BOOTP server, or use the lin_set_ip program on the SnapGear CD in
the /tools directory.
Alternately, you may choose to boot the SnapGear appliance with the initial, static IP
address of 192.168.0.1 (netmask 255.255.255.0). Refer to the start of this chapter for
details on how to activate this option.
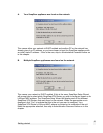
Using lin_set_ip
The lin_set_ip program is a command line tool for assigning an IP address or you
SnapGear appliance. Depending on your system configuration, you may need root
privileges to run this tool.
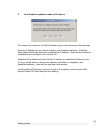
You may also need to add an extra static route using:
route add –host 255.255.255.255 eth0
where eth0 is the name of your LAN interface. You may need to prefix this line with the
route command’s directory path (e.g./sbin/route add, etc.).
Run lin_set_ip with the additional arguments of the IP address and netmask for your
SnapGear appliance, e.g.:
./lin_set_ip 192.168.0.1 255.255.255.0
After a short time, the IP address is assigned to the SnapGear appliance and the LEDs
will stop flashing.
Getting started
21