


29
Using Network Features
Network
B Network
Using Network Features
Connection to the network allows you to operate the following features:
• Checking the current status of the projector via a Web browser.
• Remotely controlling the projector via a Web browser.
• Receiving the e-mail report via the projector.
• Making the network settings for the projector.
• Displaying messages on the projected image using an application.
• Supports network monitoring, control protocol (Advertisement, PJ Talk, PJ Link, AMX
DDDP [Dynamic Device Discovery Protocol], Crestron RoomView).
• The menu displays used for the explanation below may be different depending on the model you
are using.
• Supported Web browsers are Internet Explorer 6/7/8/9/10.
• The menu displays only in English.
• If the browser of your computer is set to [Use a proxy server] when you access to the projector
from your computer, click the check mark to set accessing without using a proxy server.
• To display messages, specific application Projector Station for Network Control (Version 1.1 or
later) is necessary. For download or detailed method of using Projector Station for Network
Control, please access the following URL.
http://pro.sony.com/bbsc/ssr/cat-projectors/resource.downloads
Contact your local Sony dealer for detailed information of Projector Station for Network Control.
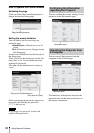
1 Connect the LAN cable (page 9).
2 Set the network settings for the
projector using “LAN Settings” on the
Connection/Power menu (page 25).
3 Start a web browser on the computer,
enter the following in the address field,
then press the Enter key on your
computer.
http://xxx.xxx.xxx.xxx
(xxx.xxx.xxx.xxx: IP address for the
projector)
You can confirm the IP address of the
projector in the “LAN Settings” on the
Connection/Power menu (page 25).
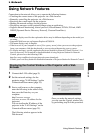
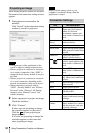
The following window appears in the
Web browser:
Once you make the network settings,
you can open the Control window only
by performing step 3 of this procedure.
Notes
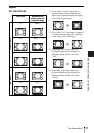
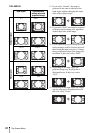
Displaying the Control Window of the Projector with a Web
Browser