


36
Projecting an Image using USB Connection
B Projecting an Image using USB Connection
Projecting an Image using USB Connection
You can also project an image simply by connecting the projector and computer with a USB A-
B cable (not supplied).
Projecting an image using USB connection requires to start USB Display.
System requirements for using the application are as follows.
OS
WindowsXP: Home/Professional (recommended)
WindowsVista: Home Premium/Business/Ultimate/Enterprise
Windows7: Home Premium/Professional (Recommended)/Ultimate/Enterprise
CPU
Pentium4 2.8GHz or faster
1 Connecting the projector and your computer with a USB A-B cable (not supplied)
(page 9).
2 Turn on the projector.
Select “Type B USB” as the input source (page 12). After a short time, the projector is
recognized as a CD-ROM drive in the computer.
3 Open “USB Display” in the CD-ROM drive.
• The resolution of your computer changes when the application is started.
• Depending of the computer’s setting, the application may start automatically.
• When you are finished using the projector, you can simply disconnect the USB cable without using
the Safely Remove Hardware option.
• Movie player (Media Player, etc.) images may not be projected properly.
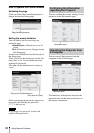
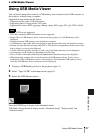
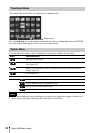
After starting USB Display, the controller
appears on the screen, and projection starts
automatically.
Starting USB Display
Notes
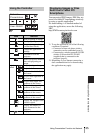
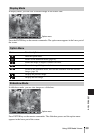
Projecting an Image Using the Controller
Items Functions
Start projecting an image.
Pause projecting an image.
Stop projecting an image
(the screen turns black).
Display information about
USB Display.
USB Display