Sony VAIO Desktop User Guide
Using your VAIO desktop
53
nN
Inserting a PC Card
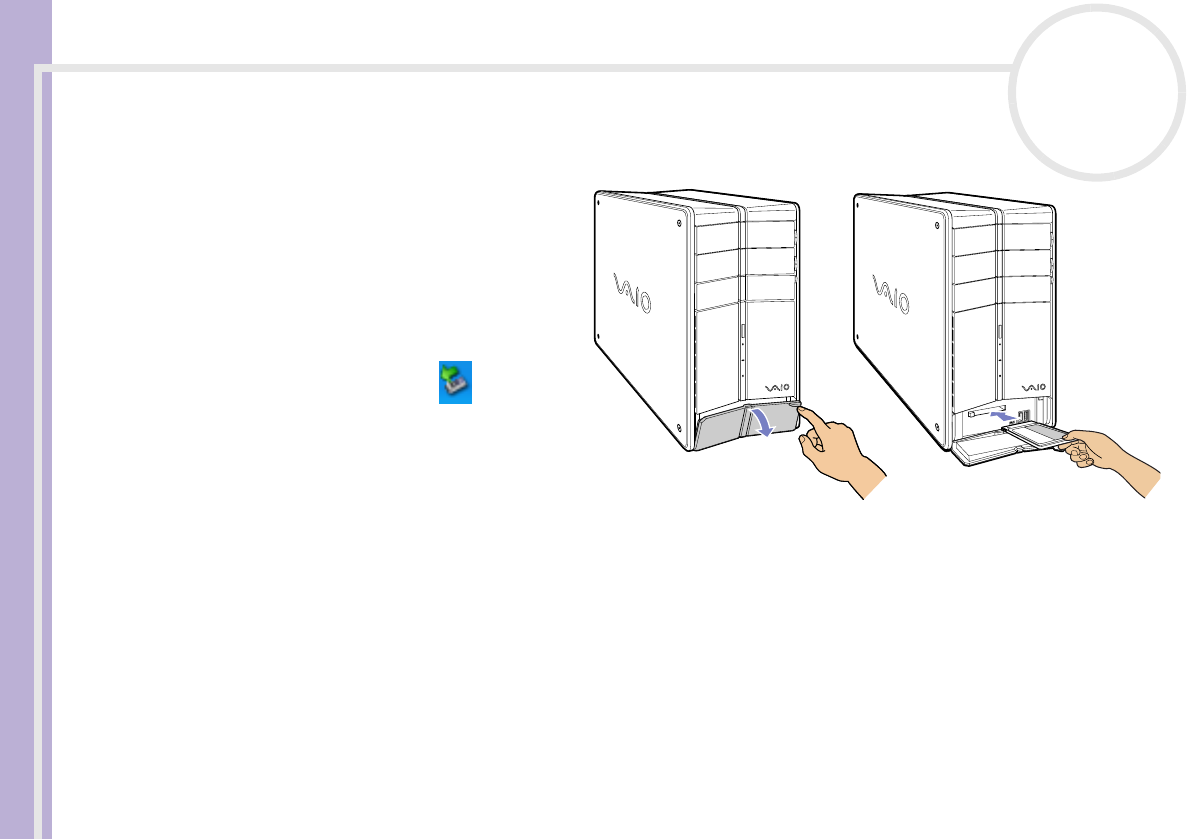
To insert a PC Card proceed as follows:
1 Open the bottom panel on the front
of your VAIO.
2 Insert the PC Card gently into the PC
Card slot with the label facing
upwards.
The PC Card is automatically detected
by your system and the Safely
Remove Hardware icon appears
in the taskbar.
3 Close the cover flap (unless the
PC Card peripheral prevents it).
✍ You do not need to shut down your computer when
inserting a PC Card.
Some PC Cards may require you to disable idle devices when using the PC Card.
You may not be able to use some PC Cards or some functions of the PC Card with this computer.
Make sure you use the most recent software driver provided by the PC Card manufacturer.
If the PC Card is operating abnormally, go to Control Panel, Performance and Maintenance, System, click the Hardware tab, and then Device
Manager. If an “!” mark appears next to the PC Card device, remove the software driver and then reinstall it from the installation CD that
accompanies the PC Card.
Do not force a PC Card into the slot. It may damage the connector pins. If you have difficulty inserting a PC Card, check that you are inserting the PC
Card in the correct direction. See the manual supplied with your PC Card for more information on use.
For some PC Cards, if you alternate between Normal power operation and Standby or Hibernate power management modes while the card is
inserted, you may find that a device connected to your system is not recognised. Reboot your system to correct the problem.


