GB
12
Location and Function of Controls
3 INPUT key
Selects the input signal. Each time you
press the key, the input signal switches
as follows:
4 TILT adjustment key
For details, see“How to use the powered
tilt adjuster” on page 12.
5 MENU key
Displays the on-screen menu. Press
again to clear the menu.
6 ENTER key
Enters the settings of items in the menu
system.
7 Arrow keys (f/F/g/G)
Select the menu or to make various
adjustments.
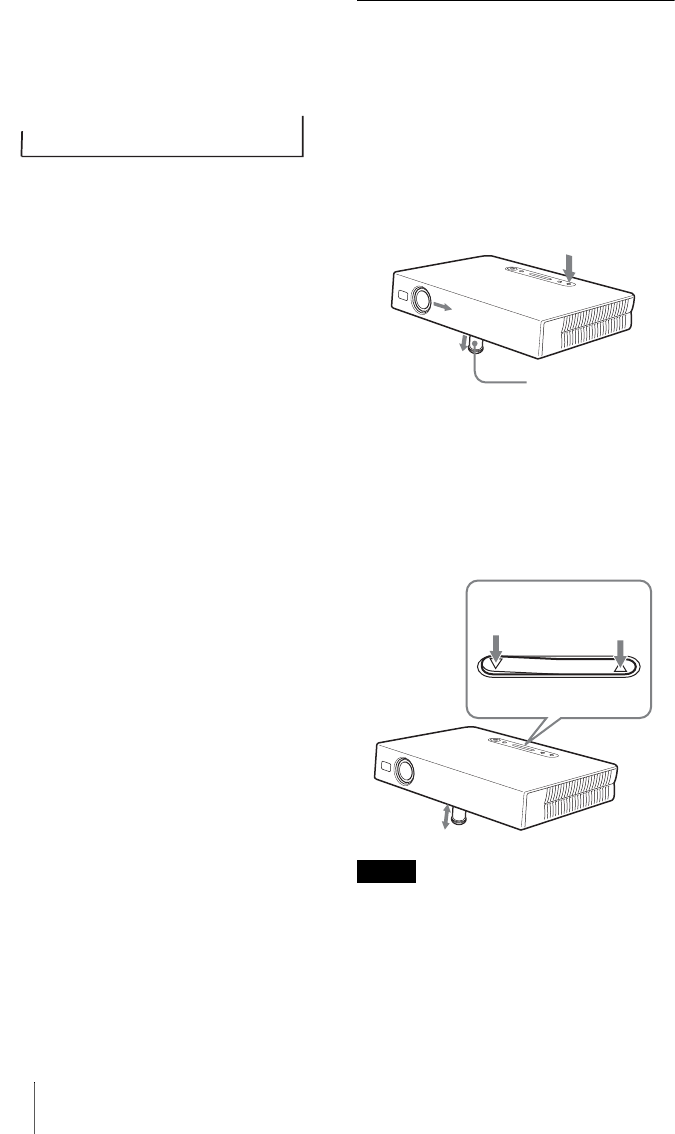
How to use the powered tilt
adjuster
To adjust the height
Adjust the height of the projector as follows:
1 Press the I / 1 key
The lens protector opens, and the
powered tilt adjuster rises automatically.
The adjuster stops at its previously
adjusted position.
2 Press f or F of the TILT key to adjust
the tilt of the projector.
You may press the D KEYSTONE key
on the Remote Commander to display
the Tilt menu and adjust the tilt using the
v/V/b/B keys.
• Be careful not to let the projector down on
your fingers.
• Do not push hard on the top of the projector
with the powered tilt adjuster out.
It may be occurred malfunction.
Input A
t
Video
t
S Video
t
Notes
Powered tilt
adjuster
TILT
to lower the
projector
to raise the
projector
TILT adjustment key


