


26 User Setup Utility
Adjusting the printer’s vertical alignment
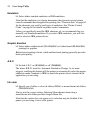
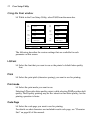
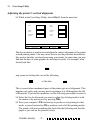
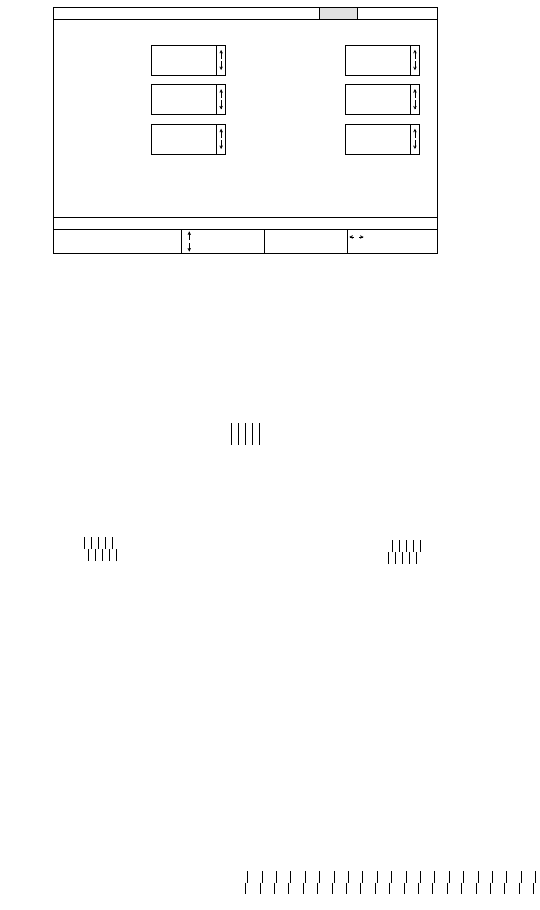
❏ While in the User Setup Utility, select Adjust. from the menu bar.
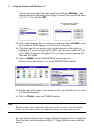
The above window is used to test and adjust the vertical alignment of the printer
in each printing mode. You may never have to use the procedure described in
this section, but after you have been using your printer for some time you may
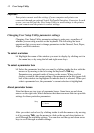
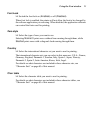
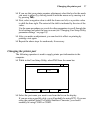
find that the dots of some graphics do not align correctly. For example, what
should look like:
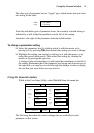
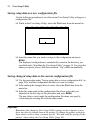
may come out looking like one of the following:
This is caused when mechanical parts of the printer get out of alignment. This
happens only rarely and you may never experience it at all throughout the life
of the printer. If you do have problems, use the following procedure to correct it.
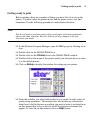
❏ Select the box for the mode you want to adjust (by clicking inside it with
the mouse or by moving to it by pressing Tab).
❏ Press your computer’s F4 function key to produce a test printing for that
mode, or press function key F5 to produce a test of all the printing modes.
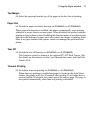
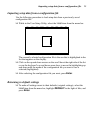
The printer will print something that looks like the following and feed the
paper so you can see the printout clearly.
Exit
Load Save General Font Paper Adjust. Port Help
Draft
(•) 0
Double-
density
(•) 0
CRT graphics
mode II
(•) 0
Triple-
density
Quadruple-
density
LQ. hex.-
density
= Scroll up
= Scroll down
= Menu Select
TAB
SPACE
= Next Box
= Set Function
Current Data:
Current Adjustment Setting
(•) 0
(•) 0
(•) 0
F4
F5
= Test
= Test ALL
*
*
*
*
*
*
or like this:
Double–density –2 :