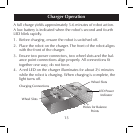
A full charge yields approximately 5-6 minutes of robot action.
A low battery is indicated when the robot’s second and fourth
LED blink rapidly.
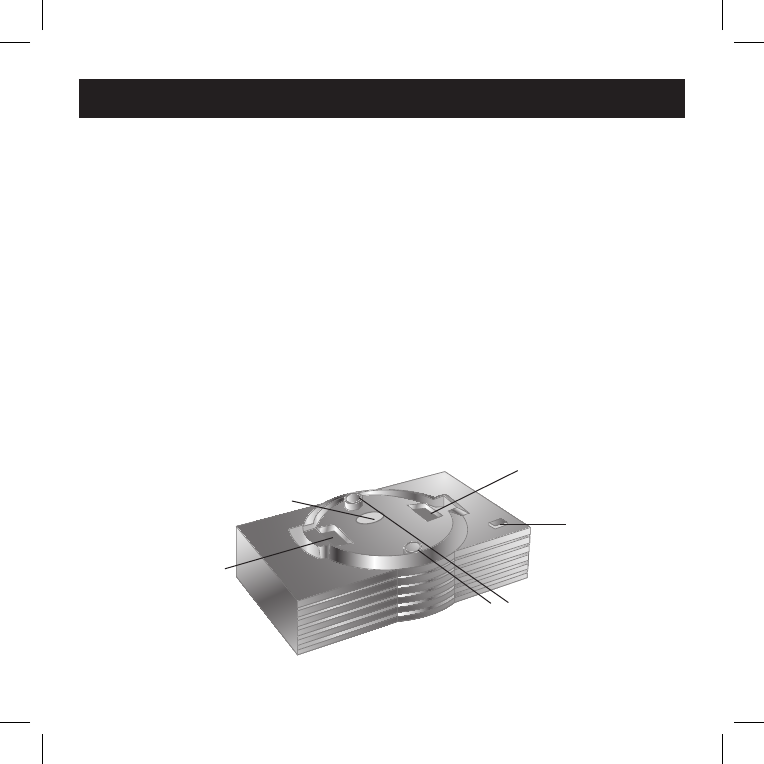
1. Before charging, ensure the robot is switched off.
2. Place the robot on the charger. The front of the robot aligns
with the front of the charger.
3. Ensure two power connectors, two wheel slots and the bal
-
ance point connections align properly. All connections fit
together one way; do not force.
4. A red LED on the charger illuminates for about 2
1
⁄
2
minutes
while the robot is charging. When charging is complete, the
light turns off.
Charger Operation
15
Holes for Balance
Points
Charging Connections
Wheel Slots
Wheel Slots
LED Power
Indicator


