


Chapter 6: Advanced Chassis Setup
6-5
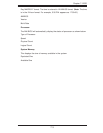
Use caution when working around the SATA backplane. Do not
touch the backplane with any metal objects and make sure no
ribbon cables touch the backplane or obstruct the holes, which
aid in proper airfl ow.
!
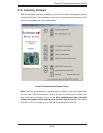
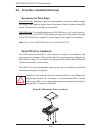
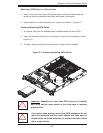
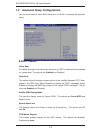
Figure 6-4. Removing/Installing SATA Drives
Mounting a SATA Drive in a Drive Carrier
Install a drive into the carrier with the printed circuit board side toward the 1.
carrier so that the mounting holes align with those in the carrier.
Secure the drive to the carrier with four screws, as shown in Figure 6-3.2.
Installing/Removing SATA Drives
To remove, fi rst push the release button located beside the drive LEDs1.
Swing the colored handle fully out and use it to pull the unit straight out (see 2.
Figure 6-4).
To install, simply push the drive carrier into its bay until fully seated.3.
!
Important: Regardless of how many SATA drives are installed,
both drive carriers must remain in the drive bays to maintain
proper airfl ow.