TANDBERG Maestro MXP
20
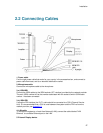
- RCA / Phono, Composite video
It is recommended to use a DVI-I or XGA connection between the TANDBERG Maestro and the
external display device to obtain best quality of video and PC presentation. Read user manual on
the display device for configuration of settings at external display to meet setting at the Codec.
Codec
The codec is the heart of the system. Its main task is the compression of outgoing video, audio
and data, the transmission of this information to the far end and the decompression of the
incoming information - the name codec comes from a combination of the two words compression
and decompression.
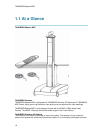
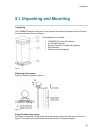
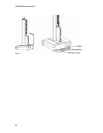
The system is easily movable with four wheels and one handle. The codec is located inside the
pedestal and behind the codec cover, which is easy removable. The pedestal stands on a solid
base with an access hatch on the rear. On the inside of the hatch there are pockets for storing
remote control and microphones. Pull the hatch to open. Inside the base there is room for
additional equipment, e.g. a VCR/DVD, and for storage of cables. The Digital Natural Audio
Module is built into the pedestal.
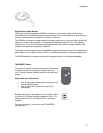
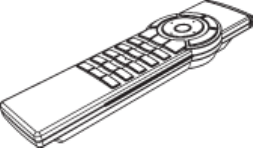
Remote Control
The remote control is used to control all functions of the system. If the screen saver is activated
(black monitor), touching the remote control will automatically wake up the system. The remote
control uses 4 AAA batteries. . Please follow the guidelines on the packing material for handling
and disposal instructions for the batteries.
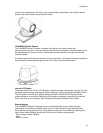
The reach of the remote control signal is 20 meters (65 ft). The remote control IR receiver is
located on the camera. For users working in an open environment with multiple systems
deployed, this can cause other systems to respond to your remote control. Use the little, white
switch placed under the batteries to change the reach of the signal from 20 meters (65 ft) to 2
meters (6.5 ft). This will prevent you from unintentionally controlling another video system, when
you control your own system.
If the screen saver is activated (black or blank monitor), pick up the remote control and touch the
sides. This will automatically wake up the system.
Microphone
The high quality table microphone is designed to be placed on a table during a videoconference.
Up to three microphones can be connected. The ideal location for the microphone is on a flat
surface at least 2m (6.5 ft) from the front of the system. The microphone cable should always
point towards the system. The system will automatically equalize sound levels. Loud and soft
voices are picked up and transmitted to the far end at approximately the same level.


