CONVENIENT COPY FUNCTIONS
27
4
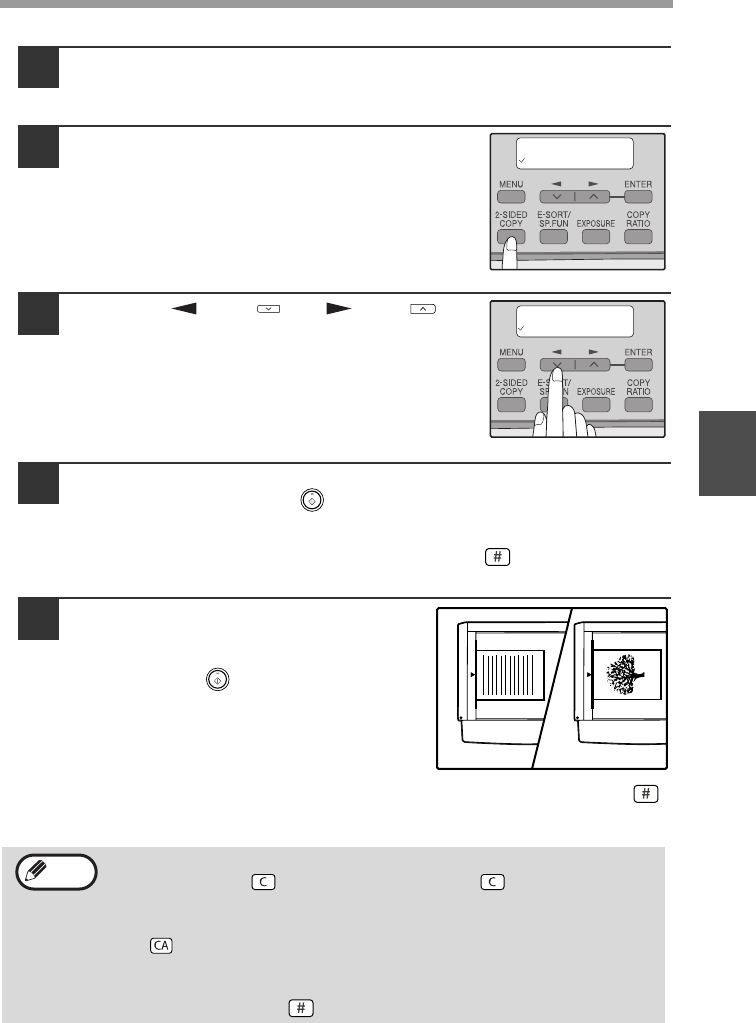
Using the document glass (e-STUDIO203SD only)
1
Place the original that you wish to copy onto the front side of
the paper on the document glass and close the document
cover/RADF.
2
Press the [2-SIDED COPY] key until "1 TO
2" appears, and then press the [ENTER]
key.
3
Press the [ ] key ( ) or [ ] key ( ) to
select the binding edge and then press the
[ENTER] key.
Select "LONG EDGE" or "SHORT EDGE".
The "LONG EDGE" and "SHORT EDGE" are
shown in the illustration on the preceding page.
4
Select the number of copies and any other settings, and then
press the [START] key ( ).
"[START] : NEXT SCAN [#] : START PRINT" appears and the original is
scanned into memory.
To immediately print the scanned image, press the [ ] key.
5
Replace the original with the next
original and close the document
cover/RADF, and then press the
[START] key ( ).
Repeat step 5 until all originals have been
scanned.
Copies will be output each time two originals
have been scanned.
When the number of original pages is odd
and "[START] : NEXT SCAN [#] : START PRINT" appears, press the [ ]
key after all pages have been scanned.
• If you need to clear the data scanned into memory, press the
[CLEAR] key ( ). When the [CLEAR] key ( ) is pressed, the
number of copies setting is also cleared.
• To cancel automatic two-sided copying, press the [CLEAR ALL] key
( ) or press the [2-SIDED COPY] key, select the "1 TO 1", and then
press the [ENTER] key.
• If the special function sort mode was selected in step 4, copying will
not begin until the [ ] key is pressed.
2-SIDED COPY
1 TO 2
BINDING EDGE
LONG EDGE
1
The first original
The second original
2
Note


