


2. PRINTER SETUP
ENGLISH VERSION EO1-33047
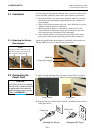
2.3 Loading the Media
E2-10
2.3 Loading the Media
(Cont.)
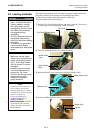
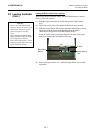
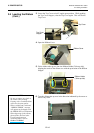
When the optional Cutter Module is fitted, the media is automatically cut.
Insert the leading edge of the media into the Media Outlet of the Cutter
Module.
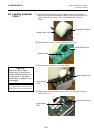
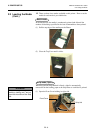
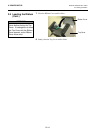
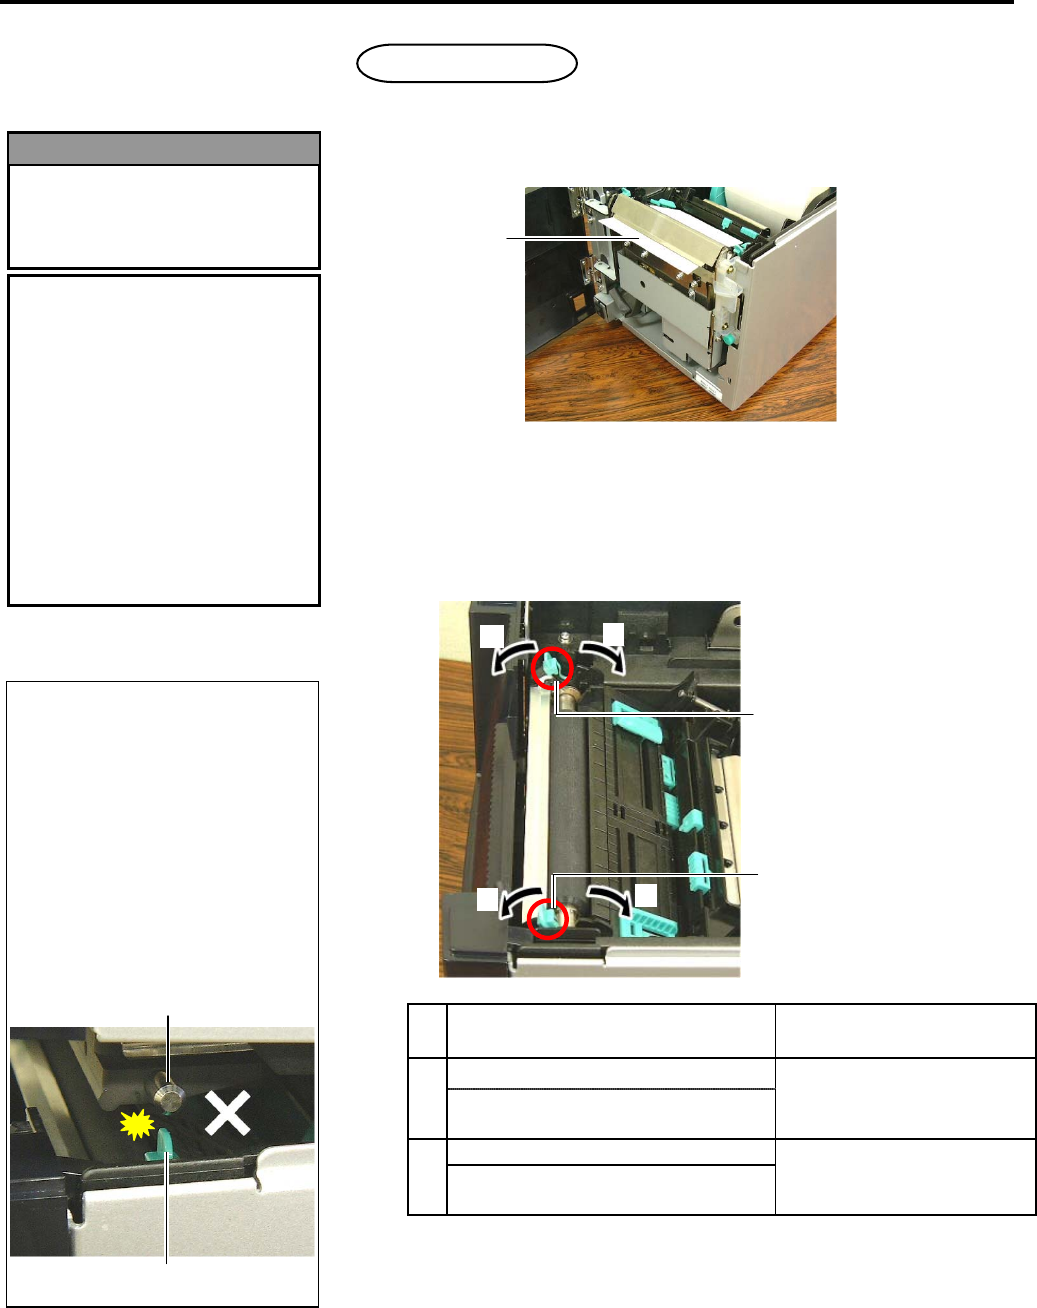
13. Change the print head pressure according to the thickness of the
media to be used, by using the Head Pressure Adjust Lever.
Media type or thickness
Head Pressure
Adjustment Lever
Label or Thin media
c
If a clear print cannot be obtained,
change the position to
d.
Move the levers toward the
front of the printer.
Tag paper or Thick paper
d
If a clear print cannot be obtained,
change the position to
c.
Move the levers toward the
back of the printer.
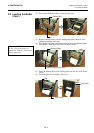
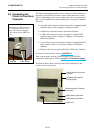
14. If the loaded media is direct thermal media (with a chemically
treated surface), the media loading procedure is now completed.
Close the Top Cover.
If the media is normal media, it is also necessary to load a ribbon.
Refer to Section 2.4 Loading the Ribbon.
Media
Cut mode
(
O
p
tion
)
CAUTION
!
1. When using a label stock, be
sure to cut the gaps. Cutting
labels will cause the glue to
stick to the cutter, which may
affect the cutter quality and
shorten the cutter life.
2. Use of tag paper which
thickness exceeds specified
value may affect the cutter
life. For the specification of
the media, refer to Section
7.1 Media.
The cutter is sharp, so care
must be taken not to injure your
fingers when handling the
cutter.
WARNING!
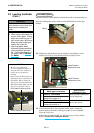
Head Pressure
Adjustment Lever
c
d
c
d
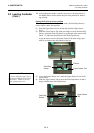
NOTES:
1. Be sure to set both Head
Pressure Adjustment Levers in
the same direction. Failure to
do this may cause blurred
printing.
2. Do not leave the Head Pressure
A
djustment Levers positioned at
the middle. When closing the
Top Cover, they block the Print
Head Positioning Shaft, and the
Top Cover cannot be closed.
Print Head Positioning Shaft
Head Pressure Adjust Lever
Head Pressure
Adjustment Lever