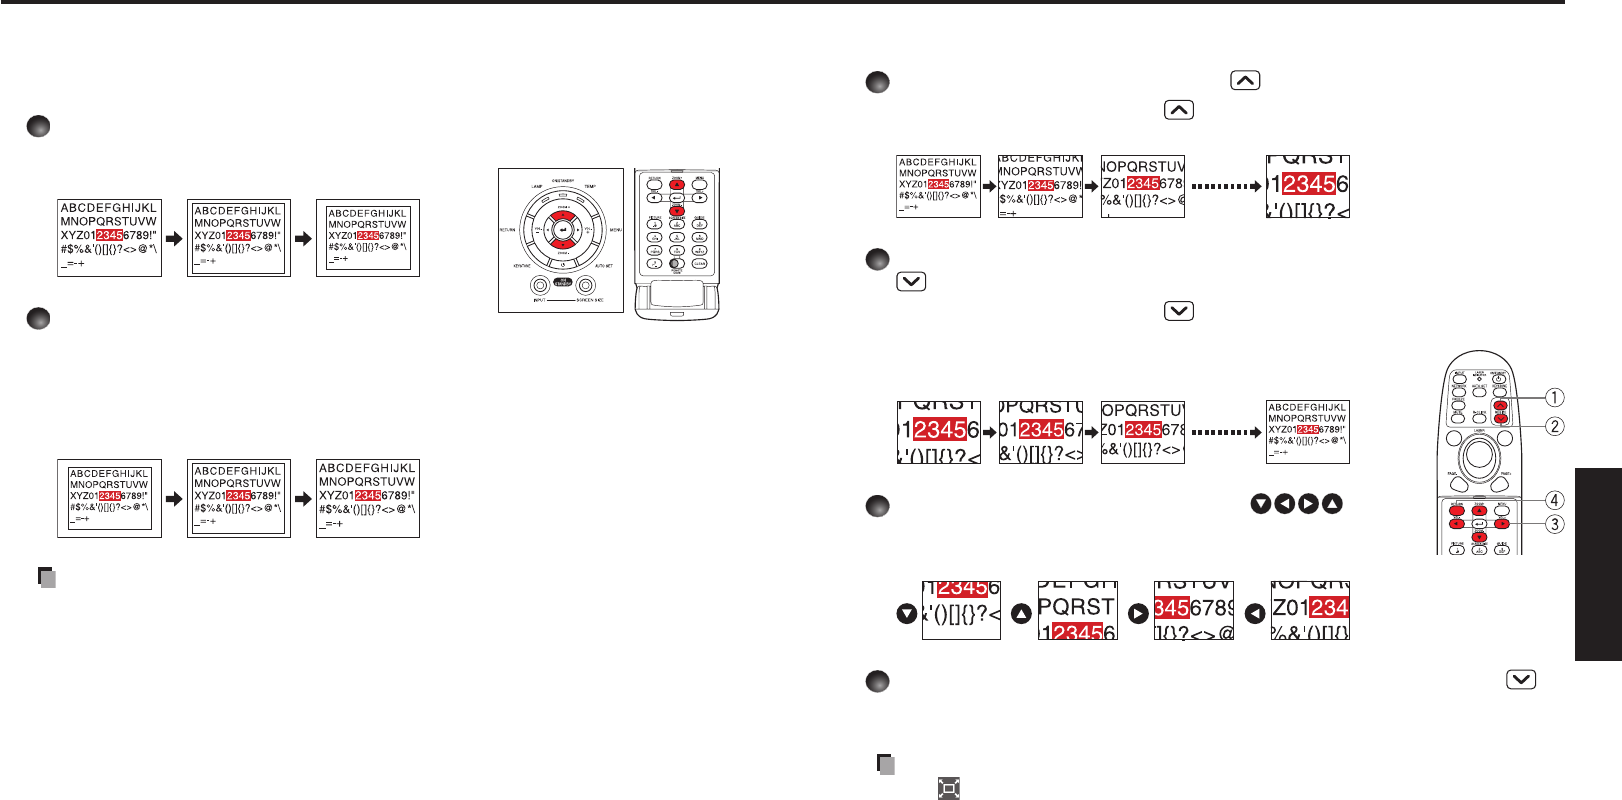
Resizing image
The projected image can be resized (zoomed in/out).
Press the remote control’s RESIZE button.
Each time you press the RESIZE button, zoom ratio is up. You can keep
pressing.
To zoom out, press the remote control’s RESIZE
button.
Each time you press the RESIZE button, zoom ratio is
down. You can keep pressing.
(However, the image cannot be smaller than the original
size.)
To move the area to zoom in, use the
buttons.
You can keep pressing.
When the image returns to the original size by pressing RESIZE
button several times, the zoom will be reset.
Pressing the RETURN button during resizing also resets the zoom.
Notes
The icon appears while resizing.
Operating a function other than Mute will release resizing.
As zooming is processed digitally, the image quality is degraded in larger zoom
ratio.
During resizing or moving the zooming area, the image may be distorted.
•
•
•
•
Zooming out the images
This projector is provided with the digital zoom (electric zoom: 100 - 62%) in addition
to the optical zoom (manual adjustment with zooming lever). (Note that the display, if
digitally zoomed out, may suffer from some degradation.)
Press the ZOOM – button.
Each time the ZOOM – button is pressed, the
image is reduced in size.
Press ZOOM + button to bring it back
to the original size.
Each time the ZOOM + button is pressed, the
image size increases.
(You cannot make it larger than the original
size.)
Notes
Pressing either ZOOM – or ZOOM + button will display an adjustment bar.
The adjustment value will automatically be saved.
•
•
Using handy features (Continued)
Remote
control
Control panel
Remote
control
