


4948
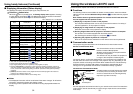
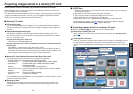
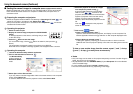
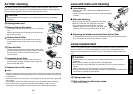
Operations
W.BALANCE OVERLAY
LOCK
STORE
IMAGE
ARM LIGHT
CAMERACAMERA
GAIN
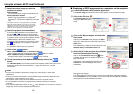
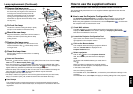
Using the document camera (Continued)
■
Sending the camera’s images to a computer (Models equipped with PC card slot)
Models equipped with a PC card slot can use a wireless LAN PC card to send images
taken with the document camera to a computer in JPEG format, and open them, or
save them to disk.
1
Preparing the computer and projector
• Mount the supplied wireless LAN PC card referring to “Mounting a PC card”
p.23
, and
select PC card input in accordance with “Select input”
p.27
.
• Set up the computer and projector in accordance with “Preparation”
p.34
, and enable
wireless LAN communication.
2
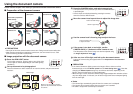
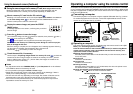
Operating the projector
q Switch to camera input.
w Display the camera image, and press the STORE IMAGE
button.
A message appears on the screen, confirming that you wish
to save the image.
e Press the
button to save the image.
(To not save the image, use the
buttons to select No, then press the
button.)
The image data is temporarily saved in the projector as a JPEG file.
When the save is complete a message appears, then disappears after a moment.
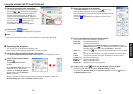
3
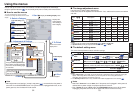
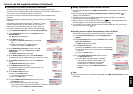
Operating the computer
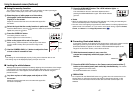
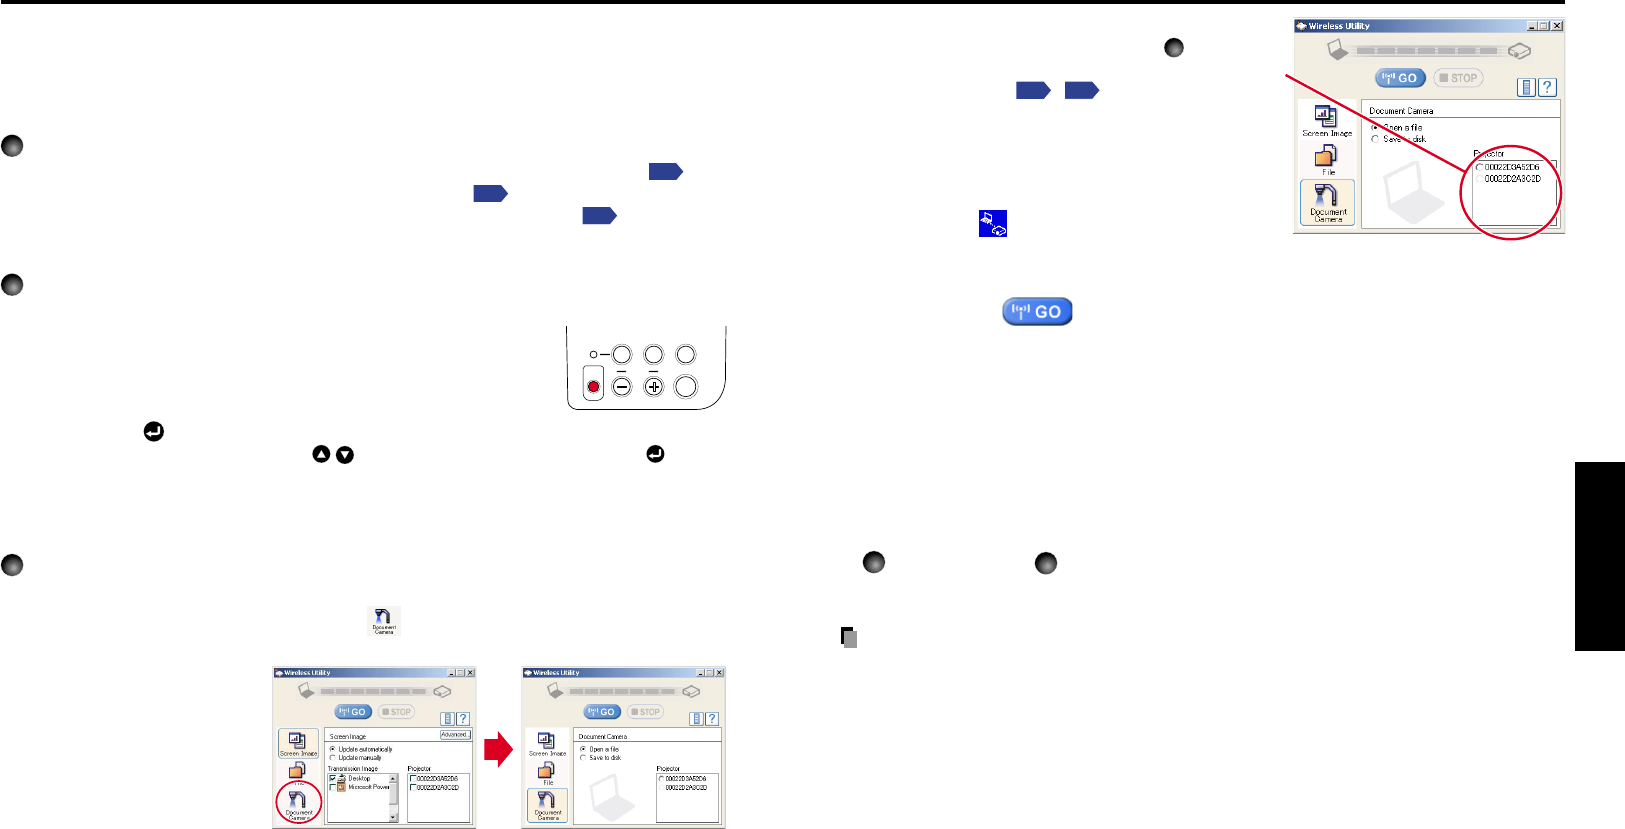
q Launch the Wireless Utility software application.
w Click on the Document camera icon
.
The Wireless Utility
window changes to
Document camera
mode.
e Select Open a file or Save to Disk.
If you only want to view the image taken with the document camera on the computer
screen, select Open a file.
To save the JPEG file sent from the projector to disk, select Save to Disk.
r Select the projector on which the images
were temporarily saved in step
2
.
A list of the MAC addresses of the wireless
LAN PC cards
p.32
,
p.59
mounted on the
projectors that are available for communication
appears. (If projector name has been set up
already, it is shown instead of the MAC
address.) Select the desired projector from this
list.
Then icon
is displayed on the projector’s
screen for few seconds.
t Click on the button.
If Open a file was selected in step e
Open the JPEG file sent from the projector, and display it on the computer. The
software application linked to the jpg extension on that computer displays the file.
If Save to Disk was selected in step e
A dialog box appears, prompting you to select a location in which to save the
JPEG file sent from the projector. Specify a file name in this dialog box to save the
file.
To view or save another image from the camera, repeat w and e of step
2
, and t of step
3
as many times as necessary.
Notes
• Only one image can be saved on this projector temporarily at a time. If another image is
saved, the current one is overwritten.
• Any adjustments other than CAMERA GAIN (+/–) and Sharpness will not be reflected
on the forwarded image.
• It is not possible to photograph resized or frozen images.
• The size of the saved file will vary, depending on the image.