


5352
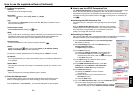
Operations
You can call up on-screen menus, and conduct a number of adjustments and settings,
using the operation buttons
p.16
on the control panel (main unit side) and remote control.
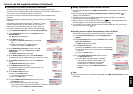
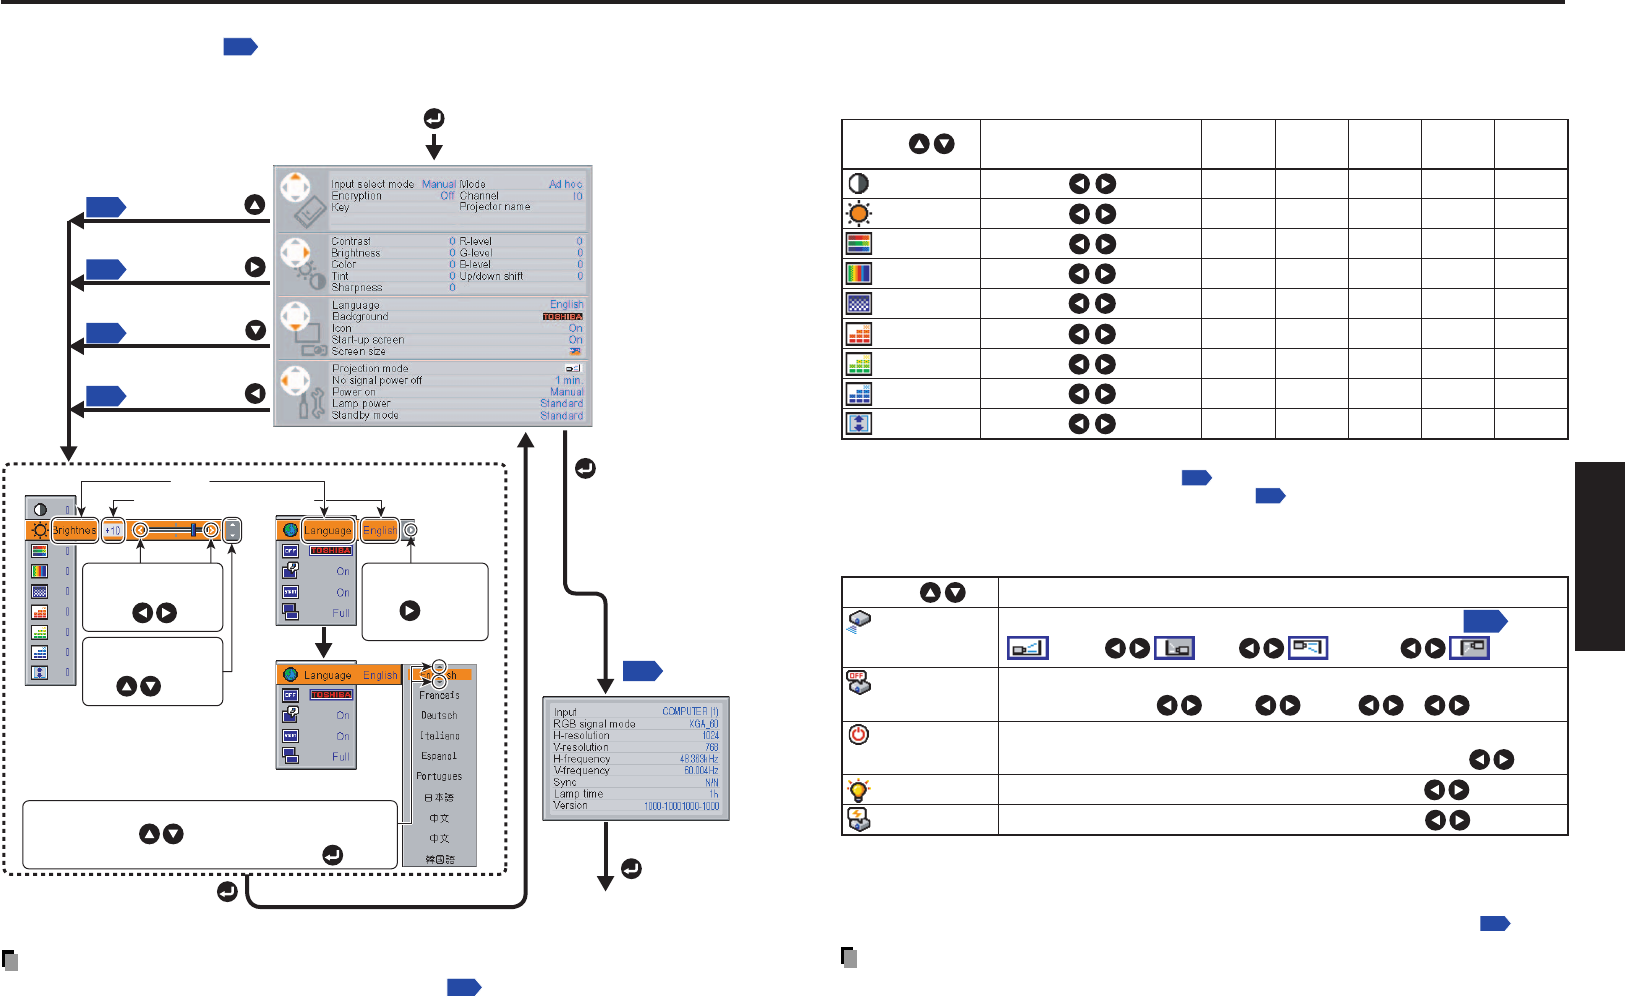
■ How to use the menus
Using the menus
Note
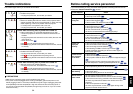
• Menu adjustments and settings (except Lamp power
p.53
) are saved when the power is
turned off via the ON/STANDBY button. If the power cord is unplugged before this, or the
power goes out, then the data will not be saved.
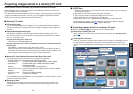
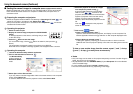
■ The image adjustment menu
Use this menu to adjust image-related items.
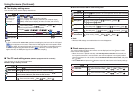
Items Items that can be adjusted are marked with “Yes”, and those that cannot are marked
with “No”.
Notes
1: Tint can only be adjusted when Video mode
p.29
is NTSC or NTSC4.43.
2: Up/down shift can only be adjusted when Screen size
p.54
is Wide.
■ The default setting menu
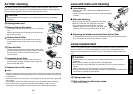
This menu shows placement status and other settings.
Set projection mode in accordance with Placement Style
Set the time to wait after signal input stops until turning off the power:
Off (not turned off) 1 min 2 min ... 60 min
Set whether to turn on the power when the ON/STANDBY button is pressed
(Manual), or when the power cord is plugged in (Auto). Manual Auto
Set the lamp power Standard Low
Set standby mode according to functions used Standard Economy
Description
Item
Projection
mode
No signal
power off
Power on
Lamp power
[Note 1]
Standby mode
[Note 2]
(Back hung
from ceiling)
(Placed
on floor)
(Rear)
(Hung from
ceiling)
p.21
Notes
1: When lamp power is set to low, the screen becomes a little darker, but the cooling fan noise gets
quieter. This setting will be cleared when you turn the power off. The setting will be back to
“Standard” when the power is turned on next time.
2: The Standby mode function is only available with models equipped with a PC card slot
p.39
.
Notes
• Note that if Power on is set to Auto, then if the power cord is plugged in when power is
restored after a power outage, the projector power will come on.
• Even if Power on is set to Auto, press the ON/STANDBY button to turn off the power.
Unplugging the power cord to cut off the power will shorten the life of the lamp.
Item Description
Computer
Y/PB/PR
Video
PC Card
Camera
S-video
Contrast Lower Higher Yes Yes Yes Yes Yes
Brightness Darker Brighter Yes Yes Yes Yes Yes
Color Lighter Deeper No Yes Yes No No
Tint
[Note 1]
Reddish Greenish No No Yes No No
Sharpness Softer Sharper No Yes Yes No Yes
R-level Less red More red Yes Yes Yes Yes Yes
G-level
Less green More green
Yes Yes YesYesYes
B-level Less blue
More blue
Yes Yes YesYesYes
Up/down shift
[Note 2]
Shift down
Shift up No Yes Yes No No
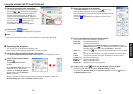
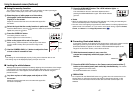
To Image adjustment menu
Display the Setting display menu
To PC card setting menu
To Display setting menu
To Default setting menu
To Status display
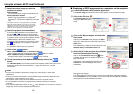
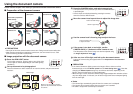
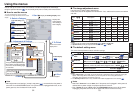
The menu disappears
1. Start
2. Select a Category
3. Adjustments & Settings
4. Back
6. End
5. To Finish
The figure shows a typical example.
As the display may differ depending
on the item, use the following pages
as a reference.
Finish via the Status
display menu.
Item
Adjustment/Setting Value
This mark signfy that
there are options.
Press to display a
list of options.
These marks signify the
items can be adjusted/set
by using .
These marks signify an
item can be switched by
using .
These marks signify the items can be selected from
the list by using .
After an item selected, apply it by pressing .
Displays the
current adjust-
ment/setting of
each category
The menu shown below is only for operation
instructions and might be different from the actual
display.
p.54
p.53
p.53
p.32
p.54