


HD Mesh Node
Trango Broadband Wireless — High Density MESH page 27
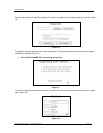
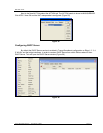
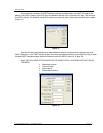
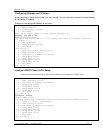
Once the Area is created, the OSPF Networks that will be distributed in the OSPF link need to be
added. In the OSPF window (Figure 35) go to the Network tab and click on the Red Plus sign. This will open
the OSPF network. The Network needs to be added to include the mask. Select the Area which was created.
(Figure 37)
Figure 37
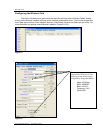
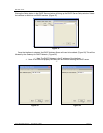
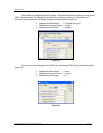
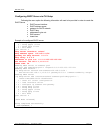
Now that the Area and Network have been added we need to configure which interfaces will pass
OSPF information. In the OSPF window (Figure 35) under the interface tab click on the Red Plus Sign to open
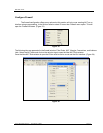
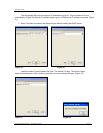
the New OSPF interface window. Select the interface and click APPLY then OK. (Figure 38)
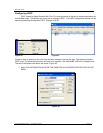
Note: THE FOLLWING SETTING MUST BE THE SAME FOR ALL ROUTERS PARTICAPTING IN
THE MESH
• Retransmit Interval
• Transmit Delay
• Hello Interval
• Router Dead Interval
Figure 38