


50
Fleet Map Programming
If you have programmed a trunk tracking bank for Motorola type and press TRUNK to start
Multi-Track, you will see user IDs display on your screen. Since the UBC780XLT defaults to
Type II systems, all the IDs will appear as numbers. However, if you notice a mix of odd and
even user IDs, for example 6477, 2560, 6481, 6144, 1167, etc., then you are probably
monitoring either a Type I or Hybrid systems.
You may also notice that you are missing responses when you hold on an active ID. Unlike
Type II, Type I/Hybrid systems require a Fleet Map that sets specific Fleet-Subfleet
parameters. It is easy to select a Fleet Map for your scanner; what is not always easy is
selecting or programming a map that matches your particular area.
There are 16 preset Fleet Maps listed in the appendix that you can choose, and these are
usually a good place to start when setting up a Type I/Hybrid trunk tracking bank. If you
choose a preset map and still have difficulty following complete conversations, then you'll
have to program your own Fleet Map.
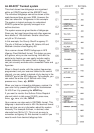
Selecting Preset Fleet Map
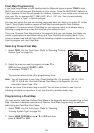
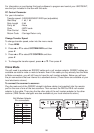
1. Select TYPE 1 for the Trunk Type. (Refer to “Selecting Trunking
System Type” on page 34.)
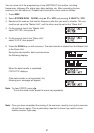
2. Select the map you want to program using ▲, ▼ or
VFO and then press E, SELECT or VFO.
For example, PRESET 16.
The scanner returns to the other programming items.
Note: You will now begin to see Type I Fleet-Subfleet IDs. For example, 100-12, 100-9,
000-12, 400-8, etc. See User Defined Fleet Maps in the Appendix for more
information about Type I IDs.
How do you know if the preset map is correct? You will have to listen to see if you're
following complete conversations. If not, you should try another preset map.
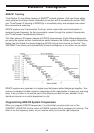
Programming a Fleet Map
You may want to read User Defined Fleet Maps in the Appendix before programming a Fleet
Map. It contains a detailed explanation of Scanner Fleet Map Programming, as well as a
table listing the Fleet Map Size Codes.
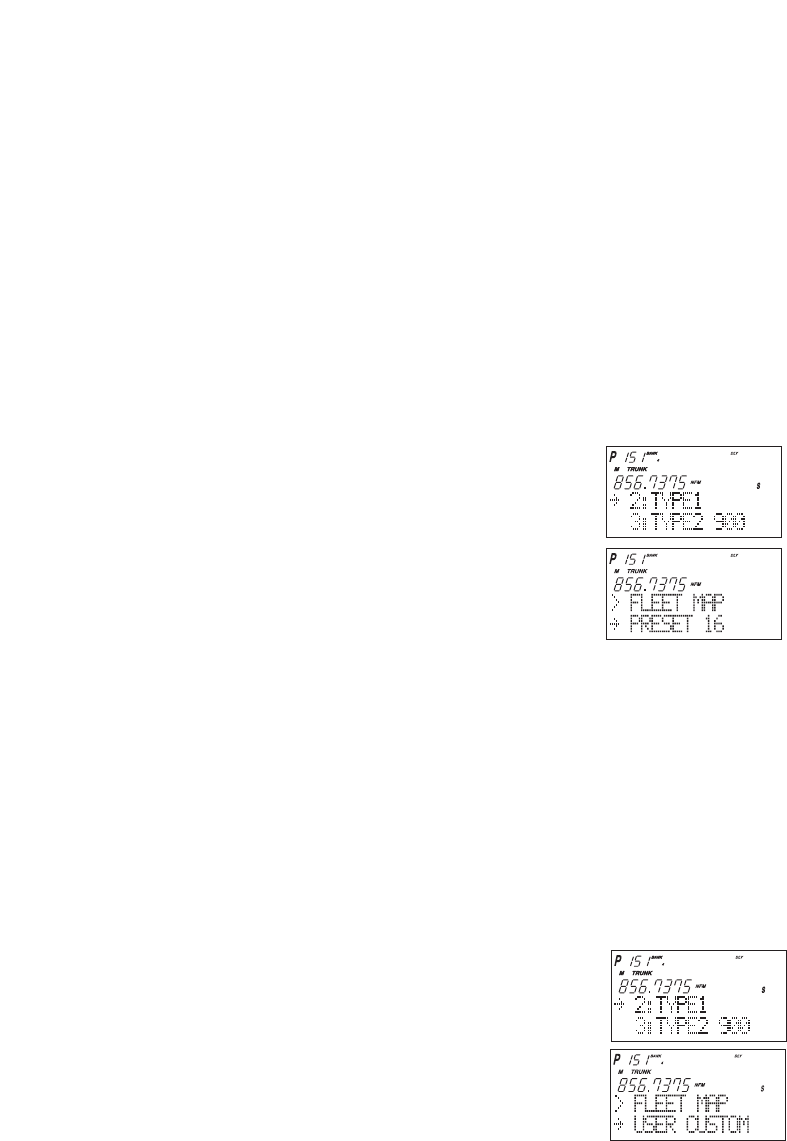
1. Select TYPE 1 for the Trunk Type. (Refer to “Selecting
Trunking System Type” on page 34.)
2. Select USER CUSTOM using ▲, ▼ or VFO and then
press E, SELECT or VFO.