


STEP 2: INSTALLING THE PAPERPORT SOFTWARE 13
STEP 2: INSTALLING THE PAPERPORT SOFTWARE
The PaperPort CD includes all the PaperPort software files.
The CD also includes the PaperPort User’s Guide, the manual for your
PaperPort software. You can read the guide while the CD is running, or
print a copy directly from the CD.
To install the PaperPort software:
1. Start Microsoft Windows and make sure that no other applications
are running.
2. Insert the PaperPort CD into your computer’s CD-ROM drive.
The CD automatically starts.
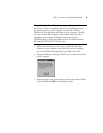
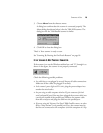
3. Click the PaperPort Software button and follow the instructions
on the screen.
After the PaperPort software is installed on your computer, you can
click the appropriate buttons on the CD to install the other
applications provided on the CD, or read and print the PaperPort
User’s Guide documentation.
4. When you’re finished installing the software, remove the CD from
the CD drive.
5. That completes the installation of the hardware and software. Please
see “Checking It Out” on page 14 to continue setting up your
Visioneer OneTouch 7600 Parallel scanner.
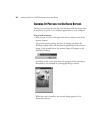
Note: If the PaperPort CD does not automatically start, make sure
the CD drive’s door is completely shut. If the CD still doesn’t start,
the autorun option on your computer is turned off. Click the
Windows 95 icon that shows the drives on your computer. (Usually,
the icon is named My Computer.) The window shows the drives
available on your computer. Double-click the icon for your
CD-ROM drive to see the list of files on the CD. Double-click the
file named START32.EXE. The CD starts.