


15
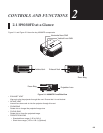
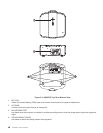
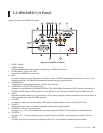
ConTrols and funCTions
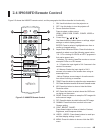
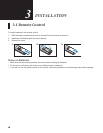
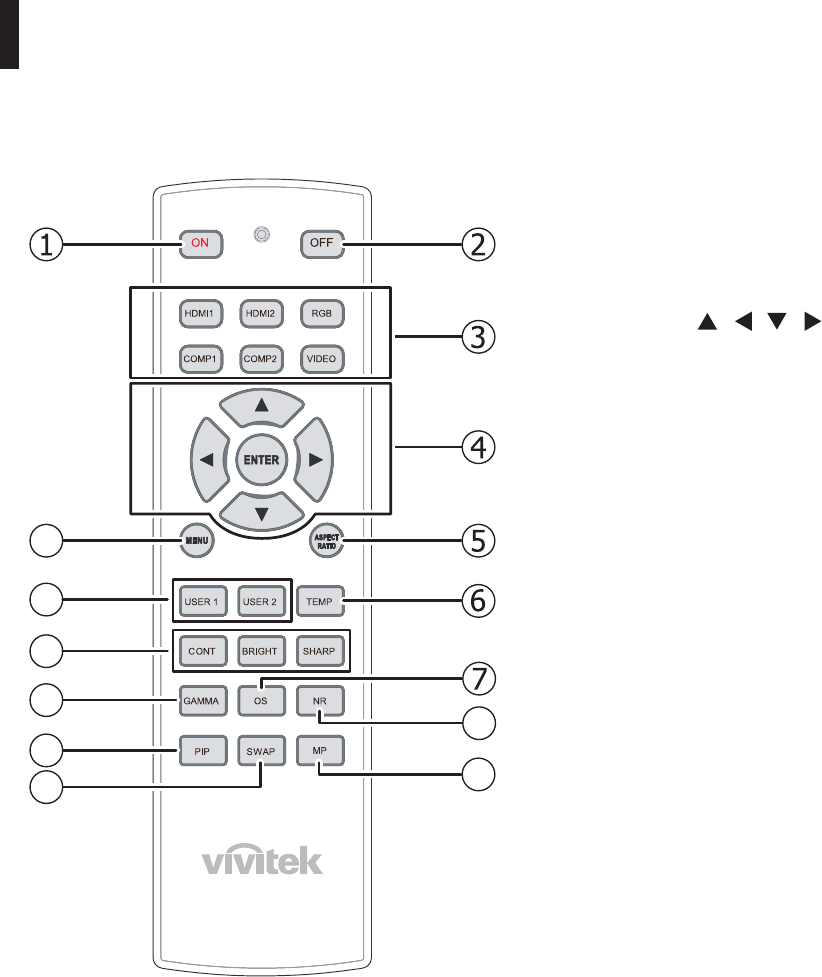
2.4 H9080FD Remote Control
Figure 2-5 shows the H9080FD remote control, and the paragraphs that follow describe its functionality.
8
9
10
11
12
13
14
15
Figure 2-5: H9080FD Remote Control
ON: Use this button to turn the projector on.
OFF: Use this button to turn the projector off.
Source Selection Buttons:
Press to select a video source.
HDMI1, HDMI2, RGB, COMP1, COMP2, VIDEO or
S-VIDEO.
Cursor Keys (
, , ,
):
Use these buttons to select items or settings, adjust
settings or switch display patterns.
ENTER: Press to select a highlighted menu item or
confirm a changed setting.
Aspect Ratio Selection Button: Press this button re-
peatedly to select one of the following aspect ratios:
• 16 : 9: For viewing 16:9 DVDs or HDTV programs in
their native aspect ratio.
• Letterbox: For viewing LaserDisc movies or non-an-
amorphic DVDs on a 16:9 screen.
• 4 : 3: Scales the input signal to fit 4:3 sources in the
center of the screen.
• 4:3 Narrow: Scales the input signal to fit 4:3
sources in the center of the screen when using an
anamorphic lens.
• Native: Displays source image in its native resolu-
tion without re-sizing or overscan.
TEMP: Press this button to adjust the color temperature.
OS: Press this button to switch to the next Overscan mode.
NR: Press this button to show or hide the Noise
Reduction slider.
MP: Press this button to select where the OSD men-
us display on the screen.
SWAP: Press this button to swap the PIP image with
active source image.
PIP: Press this button to switch to the next PIP image.
GAMMA: Press this button to switch to the next
Gamma setting.
CONT, BRIGHT, SHARP:
Press these buttons to show or hide the Contrast,
Brightness, and Sharpness sliders.
USER 1, USER 2: Press these buttons to recall pre-
set User display settings 1 and 2.
MENU: Press this button to show or hide the OSD
menu.
1.
2.
3.
4.
5.
6.
7.
8.
9.
10.
11.
12.
13.
14.
15.