


CUSTOMIZING
Page 87
Contents
Index
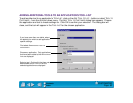
ADDING A NEW TOOL
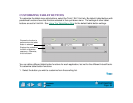
When a new Intuos2 tool is placed on the tablet, it automatically appears in the TOOL LIST. However, the
Wacom control panel settings must be saved before the tool is permanently added to the list. Whenever a
new Intuos2 tool is added it always uses the default settings for that tool, and not the custom settings of
other tools, even if they are identical devices.
There are several ways to add Intuos2 tools to the T
OOL LIST:
• When you use an Intuos2 tool on the tablet for the first time, it will automatically function with the
appropriate default settings. You can customize the tool by opening the Wacom control panel,
changing tab settings, and then clicking OK to save your changes and permanently add the tool to the
T
OOL LIST. When you place a second Intuos2 tool on the tablet, a new tool discovered message box
appears. This reminds you to open the Wacom control panel and click OK to permanently add the new
tool to the T
OOL LIST. (This message only appears if the Wacom control panel is not open. If the
control panel is open, the tool is automatically added to the list when you click OK.)
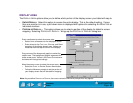
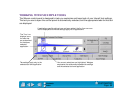
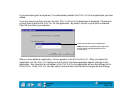
• To manually add a new tool, select T
OOL TO CUSTOMIZE... from the ADD pull-down menu. In the ADD
T
OOL TO CUSTOMIZE dialog box, select ADD NEW TOOL... and follow the prompts. Remember to click
OK or A
PPLY in the main control panel window to save your changes.
When you select a new tool that you have added to the TOOL LIST, the appropriate tab settings for that tool
are displayed. Any changes you make to the tab settings will then apply to that tool.
To remove a tool from the T
OOL LIST, select CUSTOMIZED TOOL... from the REMOVE menu. In the dialog box
that appears, select the tool to remove. Then select R
EMOVE TOOL COMPLETELY and click OK.