


Hardware Pre-configuration
Before adding the Outdoor Access Point to an existing Ethernet network, you may
need to set basic parameters — SSID, security (WEP, and possibly 802.1x), AP
name, channel number, and IP address — to make the AP compatible with the
existing network.
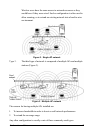
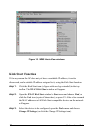
Pre-configuration can also be carried out through WMS. As long as the AP and the
management station are on the same physical Ethernet LAN, WMS’s Kick Start
function will find the AP and let you set basic parameters. Make connections as
follows:
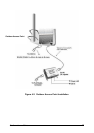
step 1. Using CAT5 waterproof cable, connect the waterproof connector port of
the Outdoor AP to the ODU port of DC Injector.
step 2. Using Category 3 or higher UTP or STP cable, connect the RJ-45 port of
DC Injector to a 10- or 10/100-Mbps Ethernet hub or switch, and connect
the management station to a hub or switch on the same LAN.
step 3. Connect the output code of power adapter to the DC Injector’s DC input
jack, and plug it into an AC outlet to power up the Outdoor AP.
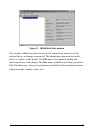
If a DHCP server is present, you can also connect the AP to the network, let it obtain
IP settings via DHCP, and use WMS’s Auto Discovery feature to learn (and
optionally adjust) those settings.
14
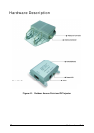
Outdoor Access Poin
t