RS2321X8 Serial Router Page 5
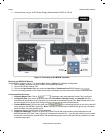
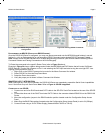
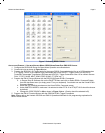
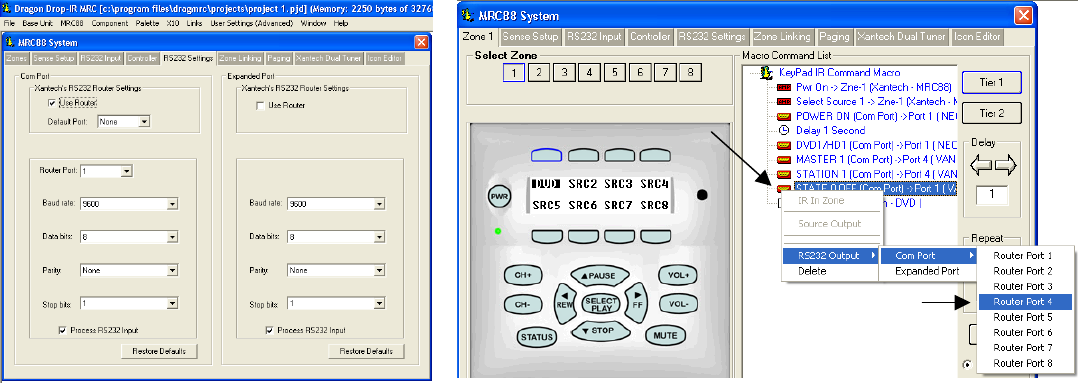
Figure 3a: MRC88 Dragon-IR Software
Configuration
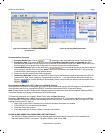
Figure 3b: Routing RS232 Commands
Right-Click on
Comman
d
Select Desired
Router Port
PROGRAMMING THE MRC88 (ROUTING THE RS232 STRINGS):
Once the RS2321X8 Router is configured, you may now place commands onto the MRC88 Keypad buttons in normal
fashion (i.e. click on Button and click on corresponding RS232 Command under desired RS232 Command Palette).
Note: Please consult the MRC88 Manual for in-depth programming instruction (See Sections labeled Selecting RS232
Command Palettes and Placing Commands on the Virtual Keypad).
To Route the commands to the specific Router Ports (refer to Figure 3b above):
Example in Figure 3b shows a Macro being created under the MRC88 Keypad DVD button that will control 2 different
RS232 Devices (Turning ON a Plasma on Port 1 and selecting the DVD Input and also turning the room light OFF via a
Lighting Control system on Port 4).
1. Right-Click on the RS232 Command to be routed in the Macro Command List window
2. Select RS232 Port from the Drop Down Menu
3. Select the Port to be routed to
4. Verify the proper port is shown in Macro Command List Window
SMARTPAD LCD™ INTEGRATION:
When used with any of the SPLCD Models, the RS2321X8 Router can seamlessly expand the Serial Control capabilities
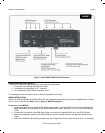
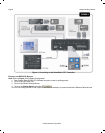
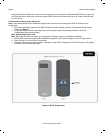
from 1 Serial Port to up to 8 Serial Ports. Note: Refer to Figure 4: SPLCD Integration.
C
ONNECTING TO THE SPLCD:
1. Connect one end of an RJ45 terminated CAT5 cable to the SPLCD’s Serial Port located on the rear of the SPLCD
unit.
2. Connect the other end of the RJ45 Terminated CAT5 Cable to the connector labeled RS422 IN on the RS2321X8
Router.
3. Move the configuration jumper to the RS422 selection position located under the Configuration-Setup Access
Panel.
4. Make Sure the BAUD Rate setting (located under the Configuration-Setup Access Panel) is set to ‘8’ (56kbps)
5. Connect Power using a 12VDC Power Supply (Xantech Model 781RG or 782-00).
© 2005 Xantech Corporation


