


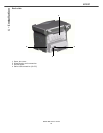

B2500
2 - Copy
B2500 MFP User’s Guide
18
Copy
Your machine can make one or more copies.
You can also setup several special copy
parameters.
Simple copy
In this case, the default parameters are applied.
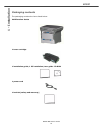
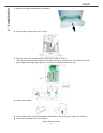
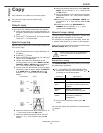
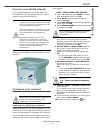
1
Place the document to be copied face down on
the glass, respecting the indications around the
glass.
2 Press the button twice. The copy is made
using the default parameters.
Special copying
Special copying allows you to do custom setups for
the current copy.
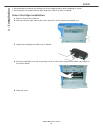
1
Place the document to be copied face down on
the glass.
2 Press the button.
3 Enter the number of copies that you want and
confirm with the OK button.
4 Choose the resolution depending on the
printing quality that you want DRAFT, AUTO,
QUALITY TEXT or PHOTO with the buttons
or , then confirm with the OK button.
5 You can print the desired copy on several paper
formats to create a poster. Select 1 PAGE TO
1, 1 PAGE TO 4 or 1 PAGE TO 9 with the
buttons or , then confirm with the OK
button.
6 Adjust the contrast level with the buttons or
, then confirm with the OK button.
7 Adjust the desired brightness level with the
buttons or , then confirm with the OK
button.
8 Adjust the desired zoom level, from 25% TO
400% with the buttons or , confirm with
the OK button.
9 Adjust the desired origin values with the digital
keyboard buttons or then confirm with the
OK button.
10Choose the paper type NORMAL, THICK with
the buttons or , then confirm with the OK
button.
11Choose the paper tray AUTOMATIC or
MANUAL with the buttons or , then
confirm with the OK button.
Special copy setup
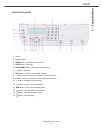
To enter various settings, press the button and
the appropriate numbers on the keypad.
For example, to change the resolution, press the
button, then press 8, 4, and 1 on the keypad.
Setups done through this menu become the device
default setups after you confirm.
Resolution setup
The RESOLUTION parameter allows you to setup
the photocopy resolution.
841 - ADVANCED FCT/COPY/RESOLUTION
1
Choose the resolution with the buttons or
according to the following table:.
2 Confirm your choice by pressing the OK
button.
You can also setup the resolution by pressing the
button.
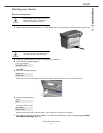
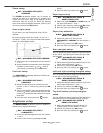
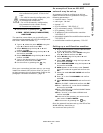
1 to 1
1 to 4
1 to 9
Analyzed sheet Output
When the print quality is unsatisfactory,
you can proceed to a calibration with
MENU 80.
Parameter Signification
DRAFT
Low resolution.
AUTO
Standard resolution for
documents containing text and
graphics.
QUALITY
TEXT
Optimal resolution for
documents containing text.
PHOTO
Optimal resolution for
documents containing
photographs.