


COLORWISE PRO TOOLS 18
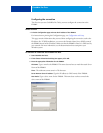
4 When you have typed all the information, click Add.
5 With the device name selected in the Devices list, click OK.
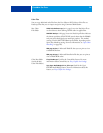
The EX8002 appears in the list of Available Servers. The first line of the entry displays the
nickname you assigned the EX8002, followed by the protocol. The second line displays the
device name.
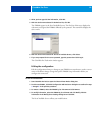
6 With the device name selected in the list of Available Servers, click Select.
7 If you are prompted for the server password, type the password and click Login.
The ColorWise Pro Tools main window appears.
Editing the configuration
Edit the configuration whenever a change to your EX8002 or network occurs, such as a server
name or IP address change. Change the specific EX8002 Setup information before you
configure the connection.
TO EDIT THE CONFIGURATION
1 Start ColorWise Pro Tools to open the Choose Printer Device dialog box.
2 To add a new EX8002, click Add. Configure the Add New Server dialog box as outlined in steps
3 through 5 in the previous procedure.
3 To remove a EX8002, select the EX8002 by its nickname and click Remove.
4 To modify information, select the EX8002 by its nickname and click Modify. Edit the
information in the Modify Server Settings dialog box and click OK.
The list of Available Servers reflects your modifications.