


13
Installation
6
English
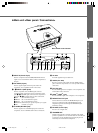
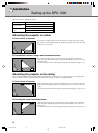
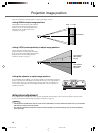
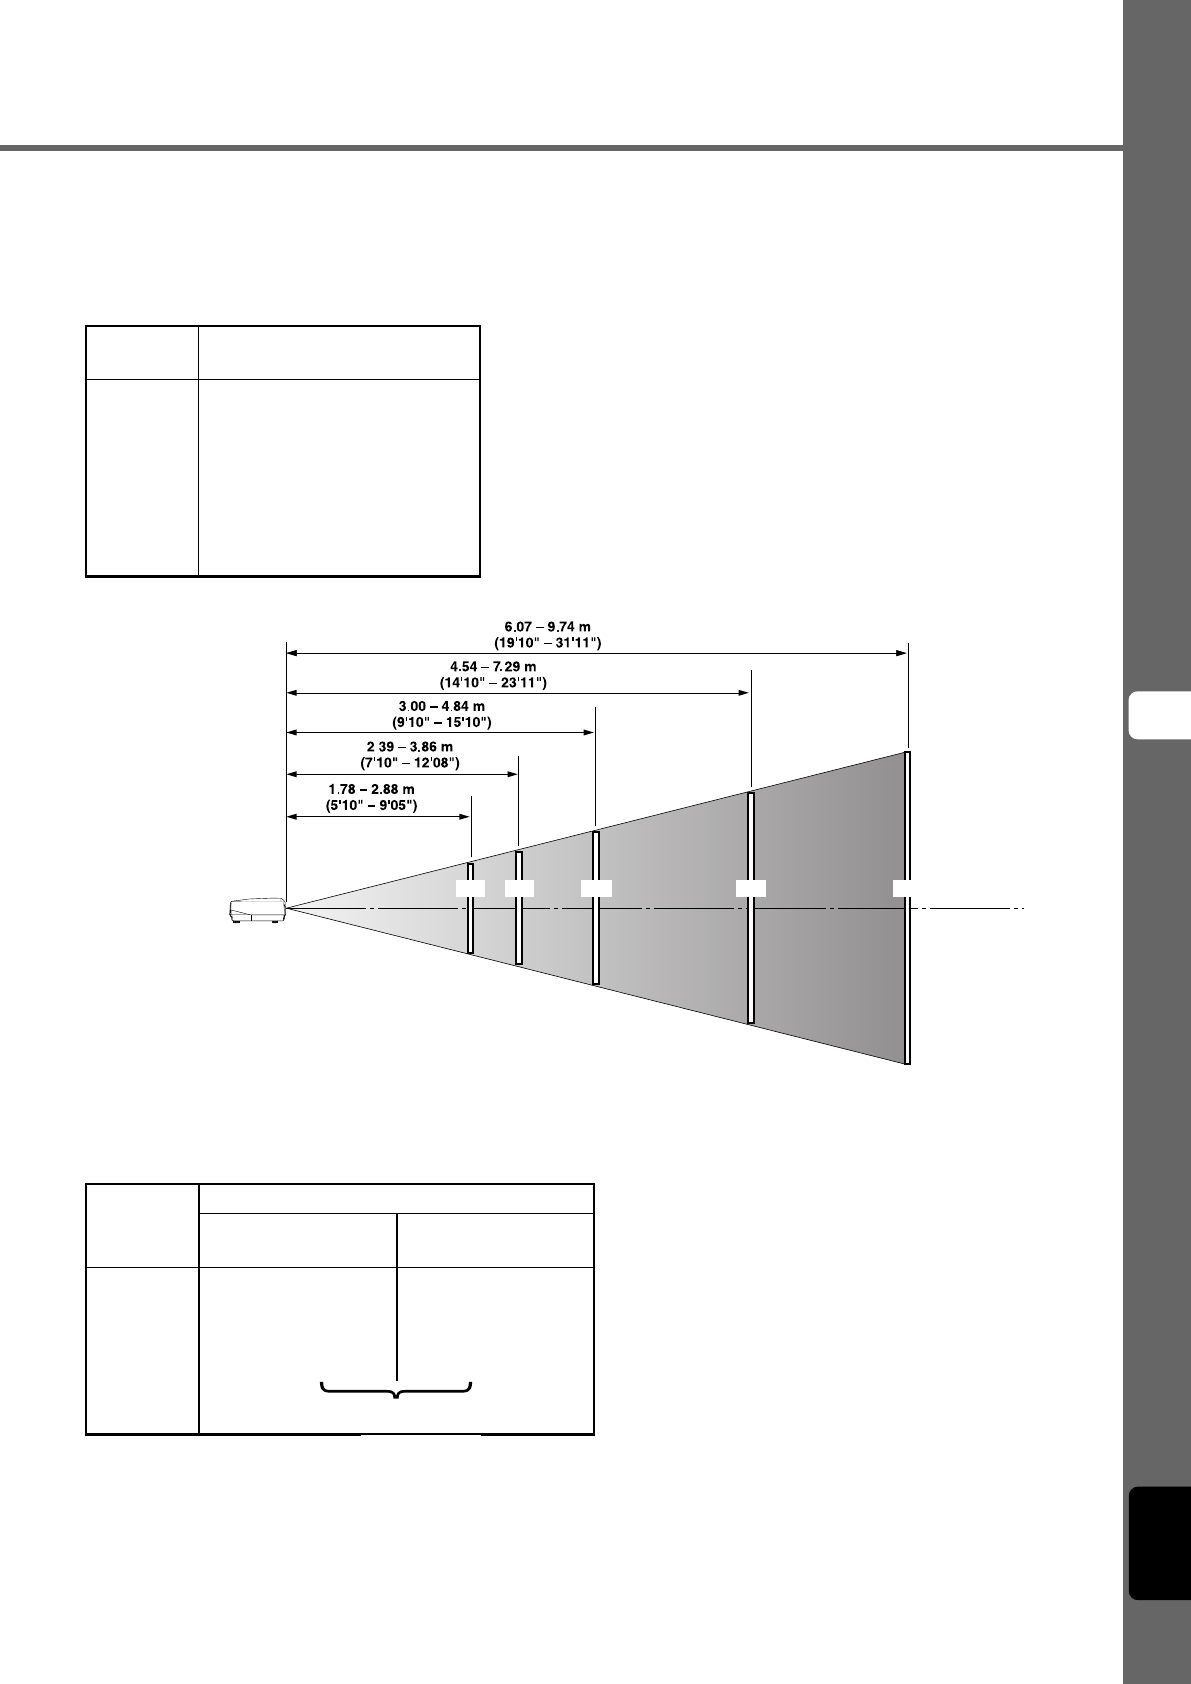
The most suitable distance between the screen and the projector (see Projection distance [a]) depends on the size of the screen (diagonal
length) you use. You can use the zoom function to adjust the projection distance within a preset range from Wide to Tele. You can also alter
the V.POS parameter to adjust the vertical position of the image to better suit the screen. Use the information in the table below to determine
the best location to place the projector in to suit your screen size.
Projection distance
<When using a 4:3 screen>
Since the DPX-1300 has a 16:9 panel, the ideal installation location for use with a 4:3 screen depends on the size of the image you wish to
view.
<When using a 16:9 screen>
60'' 80'' 100'' 150'' 200''
*These are theoretical values.
During actual use there may be a deviance of a few percent.
(*1) Projects a 16:9 image that completely fills the screen (leaves a black line at the top and bottom of the screen).
(*2) Projects a 4:3 image that completely fills the screen.
(*3) When projecting both 16:9 and 4:3 images.
You can use the zoom function to make efficient use of the screen for both *1 and *2 above. The projection distance in this case is
between Wide in *2 and Tele in *1. Use the zoom to adjust the size of the projection images so that they fill the screen completely. Note
that adjustments to V.POS may cause the position of the image to change.
Projection distance [a]
Lens
centerline
Screen size
60
70
80
90
100
110
120
150
200
Screen size
(inch)
1.78 – 2.88
2.08 – 3.37
2.39 – 3.86
2.70 – 4.35
3.00 – 4.84
3.31 – 5.33
3.62 – 5.82
4.54 – 7.29
6.07 – 9.74
Projection distance [a]
Wide (m) – Tele (m)
Screen size
(inch)
16:9 image (*1)
Wide (m) – Tele (m)
4:3 image (*2)
Wide (m) – Tele (m)
Projection distance[a]
60
80
100
120
200
1.63 – 2.64
2.19 – 3.54
2.76 – 4.44
3.32 – 5.34
5.58 – 8.94
2.17 – 3.52
2.93 – 4.72
3.68 – 5.92
4.43 – 7.12
7.43 – 11.92
(*3)
11_DPX-1300_E.p65 9/20/05, 5:07 PM13