


10 X4 ADSL Modem User’s Manual
b
bb
b
Turn the unit on by pushing the
ON/OFF
toggle switch.
The
PWR
light on the unit’s front panel turns on.
c
cc
c
Plug one end of the supplied phone cord into the unit’s
ADSL
jack and the other end into the ADSL wall jack.
d
dd
d
Plug one end of the USB cable into the modem’s
USB
jack and plug the other end into your computer’s
corresponding USB port.
3
33
3
The unit performs a startup sequence—the front panel
LINK
light blinks. (For reference, we have included a table on page
39 that explains the meaning of the X4’s front panel lights.)
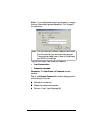
Note:
You may see a
Found New Hardware
box
indicating the progression of the installation; typically no user
action is necessary. If you are using Windows XP, however,
you may be required to click
Next
.
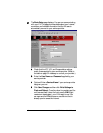
4
44
4
Depending on your operating system, you may see a
Hardware Installation
disclaimer box or a
Digital
Signature Not Found
dialog box. You can safely ignore
these messages and click
Yes
or
Continue Anyway
.
Windows XP Users:
If prompted to do so, click
Finish.
When the startup sequence is complete, the
LINK
light will
change from blinking to solid. Continue below with
Establishing Communication with the X4
.
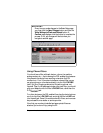
Establishing Communication with the X4
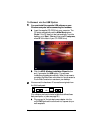
1
11
1
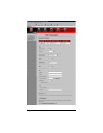
Depending on your computer’s operating system, you may
have a Zoom Web Console icon on your desktop.
•
If you do, double-click it to display the
Network
Password
dialog box.
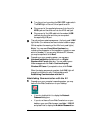
•
If you do not have a Zoom Web Console icon on your
desktop, open your Web browser, type
http://10.0.0.2
and press Enter to display the
Network Password
box.