


Chapter 26 Access Control
VES-1616F-3x Series User’s Guide
190
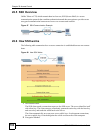
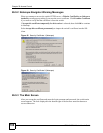
26.11 Remote Management
From the Access Control screen, display the Remote Management screen as shown next.
You can specify a group of one or more “trusted computers” from which an administrator may
use a service to manage the switch. Click Access Control to return to the Access Control
screen.
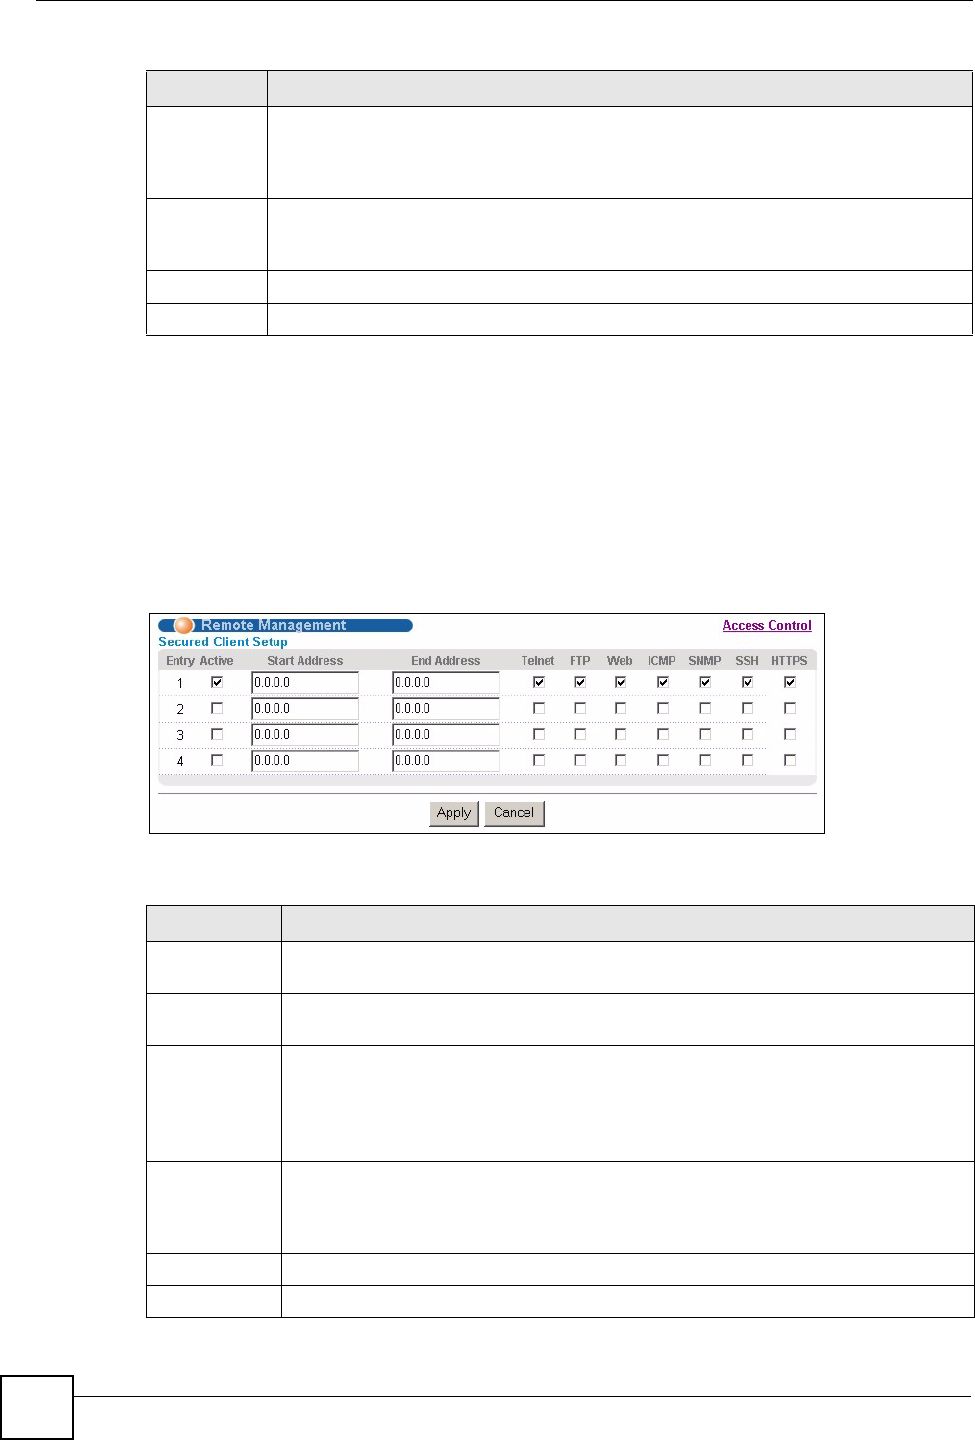
Figure 96 Access Control: Remote Management
The following table describes the labels in this screen.
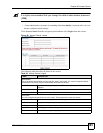
Service Port For Telnet, SSH, FTP, HTTP or HTTPS services, you may change the default service
port by typing the new port number in the Server Port field. If you change the default
port number then you will have to let people (who wish to use the service) know the
new port number for that service.
Timeout Type how many minutes a management session (via the web configurator) can be left
idle before the session times out. After it times out you have to log in with your
password again. Very long idle timeouts may have security risks.
Apply Click Apply to save your changes back to the switch.
Cancel Click Cancel to begin configuring this screen afresh.
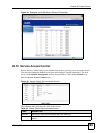
Table 66 Access Control: Service Access Control (continued)
LABEL DESCRIPTION
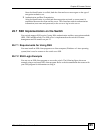
Table 67 Access Control: Remote Management
LABEL DESCRIPTION
Entry This is the client set index number. A “client set” is a group of one or more “trusted
computers” from which an administrator may use a service to manage the switch.
Active Select this check box to activate this secured client set. Clear the check box if you
wish to temporarily disable the set without deleting it.
Start Address
End Address
Configure the IP address range of trusted computers from which you can manage this
switch.
The switch checks if the client IP address of a computer requesting a service or
protocol matches the range set here. The switch immediately disconnects the session
if it does not match.
Telnet/FT P/
Web/ICMP/
SNMP/SSH/
HTTPS
Select services that may be used for managing the switch from the specified trusted
computers.
Apply Click Apply to save your changes back to the switch.
Cancel Click Cancel to begin configuring this screen afresh.