Crestron CEN-UPS1250 Uninterruptible Power Supply
Inserting and Connecting the
Battery
The CEN-UPS1250 is shipped with the internal battery pack disconnected. The front
bezel of the unit is also not attached to the unit when it is shipped.
This procedure is for connecting the battery when the front bezel has been
prematurely installed onto the chassis. Perform the following steps to connect the
internal battery pack:
1. Grasp the front panel at the sides and pull the front bezel from the unit.
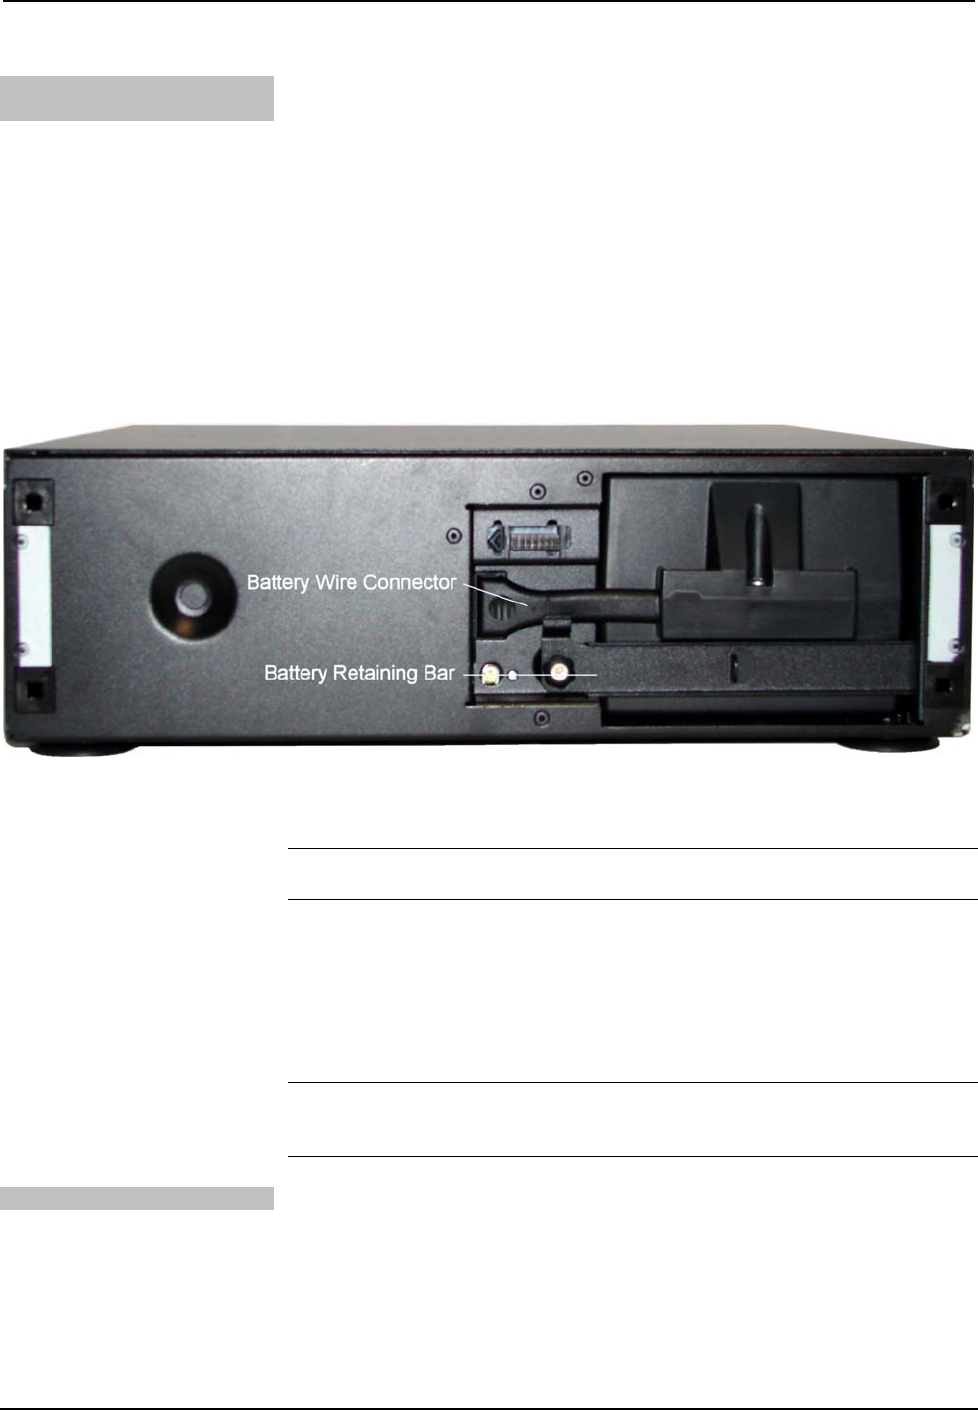
2. Remove the battery retaining bar after loosening the thumbscrew that holds
it in place (refer to illustration below).
3. Push the battery wire connector into the hole located to the left of the
battery pack. Ensure it is secure by gently pulling on the wire to be certain it
is attached to the connector.
Battery Wire Connection
4. Install the battery retaining bar and tighten the thumb screw to secure it in
position.
WARNING: Failure to install the battery retaining bar can be hazardous to the
installer.
5. Install the front bezel by aligning the four pins located on the back side of
the bezel with the holes in the left and right sides of the front of the unit.
Gently push the front bezel into place.
Hardware Hookup
WARNING: Do not make telephone, cable, Ethernet, antenna, electrical or ground
system connections during a lightning storm. Failure to comply may result in
personal injury or death.
Connect the Device
Due to the unique filtering provided by the CEN-UPS1250, Crestron recommends
that you connect the AV components as labelled on the rear panel of the unit.
To ensure ground loops are eliminated and to ensure there is no audible hum in your
speaker system, ground all AV components to the ground binding post (marked G)
located on the rear panel.
Make the necessary connections as called out in the illustration that follows this
paragraph.
Operations & Installation Guide – DOC. 6635A Uninterruptible Power Supply: CEN-UPS1250 • 15
