9
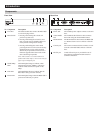
Hardware Setup
Installation
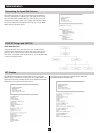
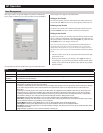
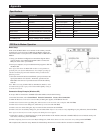
To install the B051-000, refer to both the installation diagrams and
the following steps:
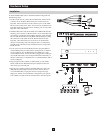
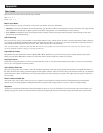
1. To add a local console, connect the included USB – PS/2 Console
connector kit to the B051-000 Console port. Connect the local
keyboard, monitor and mouse to the connector ports on the USB –
PS/2Consoleconnectorkit.Note:Youcanuseanycombinationof
keyboard and mouse connections. For example, you can use a PS/2
keyboard with a USB mouse.
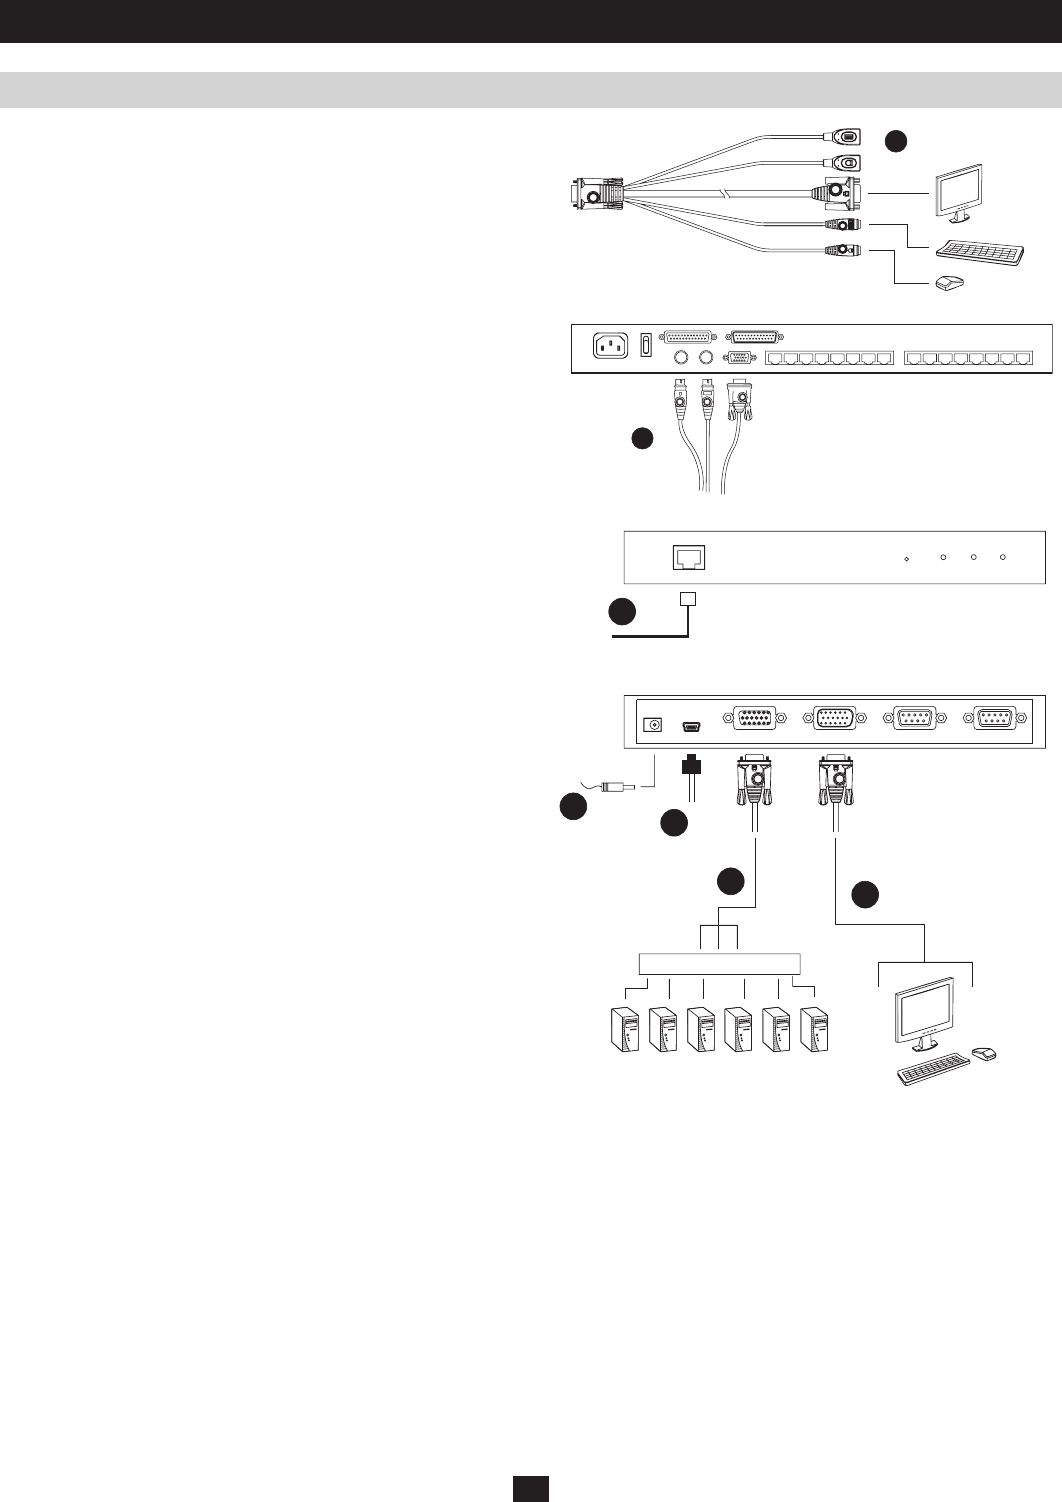
2. The B051-000 comes with both a PS/2 and a USB KVM cable kit,
allowing you to connect to a KVM switch or server with either type
ofconnector.ConnecttheYellowHD15connectoroftheincluded
PS/2 or USB KVM cable kit to the B051-000 PC/KVM port. Plug
the connectors on the other end of the KVM cable kit into the
keyboard, video and mouse ports of the server or KVM switch
that you are installing. Note: The diagram shows a connection to
a KVM switch with PS/2 mouse and keyboard ports using a PS/2
KVM cable kit.
3. If you want to use the Virtual Media function, plug the USB 2.0
Virtual Media Cable provided with this package from a computer/
server’s USB port into the B051-000 Virtual Media port. Note:
Virtual Media will not work if the cable is plugged into a USB port
on a KVM switch that is used for keyboard/mouse functionality, it
must be connected to a computer/server or a KVM USB port that is
strictly a Hub port.
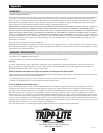
4. Plug a Tripp Lite Cat5e (N001- or N002-Series) or Cat6 (N201-
Series) cable into the B051-000 LAN port and then connect the
otherendtoyournetworkjack.
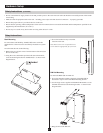
5.PlugthepoweradaptercableintotheB051-000powerjack,and
then plug the power adapter into an AC power source. Note: It
is recommended that you plug the unit into a Tripp Lite Surge
Suppressor, UPS or Line Conditioner to help protect your system
from sudden, transient increases and decreases in electrical power.