


6
10-Port 100BASE-FX and 20-Port 10/100BASE-TX Fast Ethernet Layer 2 Switching Modules Quick Start Guide
Installation
Prerequisites
Before you install a module, make the following preparations:
■ Verify that the chassis is properly installed in a rack, on a table, or on a
shelf, according to the instructions in either of these guides:
■
7-Slot Chassis Quick Installation Guide for the CoreBuilder 9000
Enterprise Switch
■
Chassis Quick Installation Guide for the CoreBuilder 9000
Enterprise Switch 8-slot Chassis and 16-slot Chassis.
■ Have a flat-blade torque screwdriver available to secure the module to
the chassis after you install it.
■ Read the CoreBuilder 9000 Release Notes for the Fast Ethernet and
Gigabit Ethernet Layer 2 Switching Modules for important information
about installing and upgrading modules in an existing chassis or a new
chassis.
CAUTION: All modules in a CoreBuilder 9000 chassis must operate at
compatible software levels. You must verify the software release on all
new and existing modules in your chassis and upgrade as necessary. See
the CoreBuilder 9000 Release Notes for the Fast Ethernet and Gigabit
Ethernet Layer 2 Switching Modules for a module software compatibility
requirements table, mandatory upgrade procedures, and other important
information.
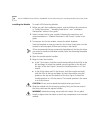
Module Placement
in the Chassis
Note the following chassis slot restrictions and recommendations when
you choose a chassis slot for the
10-port 100BASE-FX Fast Ethernet
Switching Module or the 20-port 10/100BASE-TX Fast Ethernet
Switching Module:
■ In the 7-slot chassis:
■
Do not install the module in slot 7. This slot is reserved for a
Gigabit Ethernet (GEN) Switch Fabric Module.
■
Install the module in slot 1, 2, 3, 4, 5, or 6.
■ In the 8-slot chassis:
■
Do not install the module in slot 7 or slot 8. These slots are
reserved for GEN Switch Fabric Modules.
■
Install the FEN Switching Module in slot 1, 2, 3, 4, 5, or 6.