


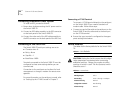


3-6 CHAPTER 3: SETTING UP FOR MANAGEMENT
Source Routing Prerequisites
If you plan to operate the Switch 2000 TR in a source
routing environment, you need to assign a segment
ID. Follow the instructions below, from the Port Setup
screen:
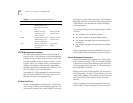
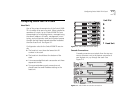
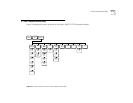
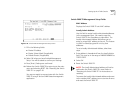
1 Select Bridge from the bottom of the Port Setup
screen.
The Port Bridge Setup screen appears.
Figure 3-3 Port Bridge Setup Screen (Attached LAN ID Setting)
2 Assign an Attached LAN ID under the Source Routing
heading on the right side of the screen.
The Attached LAN ID is set to FFFF which is the
default setting for “not assigned.”
You must assign a value to this field to perform
source routing. Refer to “Setting Source Route Bridg-
ing in Chapter 4 for more information.
Switch 2000 TR Management Consoles
The following sections describe how to get started
managing your Switch 2000 TR. If you plan to
manage the Switch 2000 TR using IP or SNMP, you
will have to assign an IP address to the Switch 2000
TR using one of these interfaces:
■ VT100 Console Interface. See Chapter 4.
■ LCD Console Interface. See Chapter 5.
■ BootP may also be used to assign IP address. Refer
to “Setting Up BOOTP”.
The VT100 Console
This section describes the screen conventions used in
the Switch 2000 TR VT100 console interface. The
VT100 interface allows you to set and/or view these
switch parameters:
■ IP and associated addresses and management
■ Port personality, speed, and state
■ Bridge type, bridge number and Spanning Tree
state
■ Switch 2000 TR status and hardware and software
version numbers
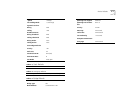
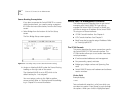
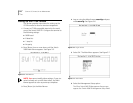
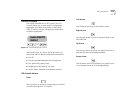
Choice Field
Example display:
*text*
Text enclosed with asterisks is a list from which you
can select one option. Press [Space] to cycle through
the options. When your choice is highlighted press