


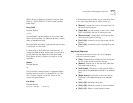

Setting Up the LCD Console 3-15
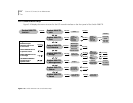
Setting Up the LCD Console
This section provides instructions for setting up the
LCD console for local or remote management.
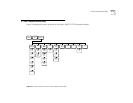
1 Press the [Enter] button on the front panel LCD to
enter the main menu.
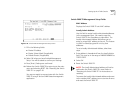
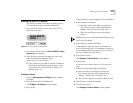
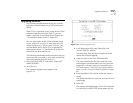
Figure 3-11 Front Panel LCD Main Banner
2 Press [Down Arrow] until the Switch 2000 TR >Man-
agement screen appears.
3 Press [Enter] to enter the management menu and
select the desired management type.
At this point you can choose IP.
■ If you choose IP, you need to assign an IP address,
subnet mask and default router in order to com-
municate with the Switch 2000 TR. Refer to “IP
Address Setup” on.
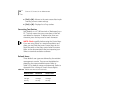
IP Address Setup
From the Management>IP Mgmt screen, proceed
as follows:
1 Press [Enter] to select IP address field.
The IP Mgmt >IP Address screen appears.
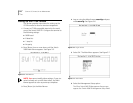
2 Press [Enter].
A blank decimal notation appears on the IP Address.
3 Enter IP address as follows:
■ Select the value of the digit by moving the
[Up or Down Arrow] until the desired value
appears. Choose from 0 through 9 and “.”.
■ Select the next digit by moving the [Right
Arrow].
NOTE: Be sure to use standard dotted decimal nota-
tion for the IP address.
4 Press [Enter] to accept the address.
If the address is valid, you return to the previous
menu by pressing [Enter]. If the address is invalid an
error message displays and returns you to the previ-
ous menu when you press [Enter].
5 Press [Down Arrow].
The IP Mgmt >Subnet Mask screen appears.
6 Press [Enter].
A blank decimal notation appears in the Subnet Mask
field.
7 Enter the Subnet Mask address as follows:
■ Select the value of the digit by moving the
[Up or Down Arrow] until the desired value
appears. Choose from 0 through 9 and “.”.
■ Select the first digit by moving the [Right Arrow].
8 Press [Enter] to accept the address.
9 Press [Down Arrow].
The IP Mgmt >Default Router screen appears.
ENTER
Switch 2000 TR
Unit Id: 1
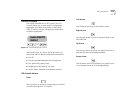
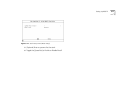
Switch 2000 TR
Unit Id. 1