Installing the Modem Interface 17
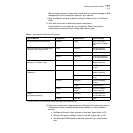
3 As these components are added, you may be asked to provide:
■ NetWare or Microsoft client software on hard disk, floppy diskettes, or
CD-ROM
■ Windows 98 system installation files on hard disk, floppy diskettes, or CD-ROM
■ The Windows 95/98 Installation Disk that came with your LAN+Modem card
Each time you add one of these components, Windows 98 creates a new entry in
the Network window.
4 When all of these components have been added, you must modify their properties
to comply with the network requirements for your site. The parameters you will
need to add or customize for network operation under Windows 98 can be found
under the Properties tab for the network components you added.
Confirming Installation
1 Double-click the My Computer icon.
2 Double-click the Control Panel icon.
3 Double-click the System icon. The System Properties box appears, detailing your
system setup.
4 Click the Device Manager tab. A list of devices appears, arranged by type.
5 Double-click Network Adapters. The LAN+Modem card name appears, confirming
successful installation.
6 Double-click the entry for the LAN+Modem card to display a description of the
card and its current status. The device status should indicate “This device is
working properly.”
7 Click the Cancel button to return to System Properties.
8 Click OK to exit System Properties.
Installing the Modem
Interface
■ Setup Procedure
■ Confirming Installation
■ Testing the Modem
Setup Procedure Once the system is rebooted with the LAN+Modem card installed, Windows 98
automatically detects the modem interface.
1 Windows 98 opens the Add New Hardware Wizard dialog box and identifies the
modem interface.
2 Select “Search for the best driver for your device” and click Next.
3 Select Floppy Drives, insert the LAN+Modem card Windows 95/98 Installation
Disk, and click NEXT.
4 After the hardware wizard finds the installation files on the diskette, it displays the
card name, 3Com 10-100 LAN + 56K Modem PC Card (Modem interface). Click
Next.
5 Click Finish when the system displays “Installation complete.”


