


What’s Next? 93
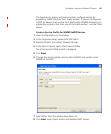
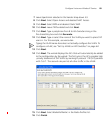
6 Click Next. Select the ports you want to use in the VLAN and click Add
or Move.
The Add button adds the ports to the new VLAN without removing
them from any other VLANs.
The Move button removes the ports from all other VLANs, and places
them in the new VLAN.
The ports appear in the Current Members list.
To tag ports in the VLAN, select Tag and edit the tag value. (Tagging is
required if you click Add, because the ports are then members of
multiple VLANs.)
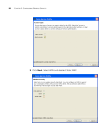
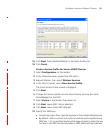
7 Click Next. (Optional) To assign an IP interface to the VLAN, edit the IP
address or select DHCP Client. To enable the IP interface, select Interface
Enabled.
8 Click Finish.
The new VLAN appears in the Content panel.
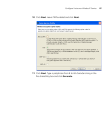
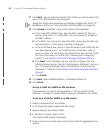
For SVP, continue with the following steps, to disable IGMP snooping. For
VoWIP types that do not require IGMP to be disabled, you can stop here.
9 Select the VLAN in the VLANs table and click Properties.
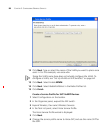
10 Click the IGMP tab.
11 Deselect Enabled, to disable IGMP snooping on the VLAN.
12 Click OK.
What’s Next? After you create VoWIP access services, you can create another service.
For information about configuring an additional service, refer to:
“Configure Guest Access Services” on page 67
You can create your RF environment, and deploy your configuration and
enable monitoring.
For information about creating your RF environment, refer to:
“Using RF Auto-Tuning” on page 95
“Using RF Auto-Tuning with Modelling” on page 103
“Using RF Planning” on page 119