


8e6 enterprise reporter Quick start Guide 41
Step 3: R3000 Conguration
If you are using 8e6’s R3000 for your Web-access logging device, this step can be per-
formed any time during ER setup, but must be completed in order for the ER to receive
logs from the R3000.
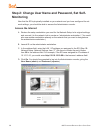
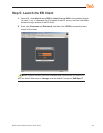
A. Access the Administrator console of the R3000.
B. Choose the Reporting button at the top of the screen to display the Reporting sec-
tion of the Administrator console.
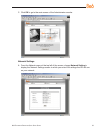
C. From the navigation panel at the left of the screen, choose Report Conguration to
display the Report Conguration window.
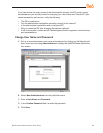
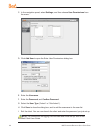
D. Select 8e6 Enterprise Reporter, and then click Save.
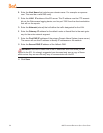
E. On the 8e6 Enterprise Reporter tab, in the Server eld, enter the LAN 1 IP address
you assigned to your ER (Step 1A: Quick Start menu: administration menu, or Step
1B, Network Setup: Network Settings, item “C”).
F. Click Add to include this IP address in the Remote Server list box. Your R3000 is
now set to transfer its log les to your ER via HTTPS.
NOTE: It is recommended you wait for 1 - 2 hours after the initial installation
so sufcient data is available for viewing.
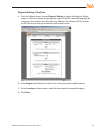
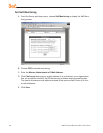
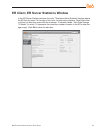
You can see if log les have transferred by accessing the ER’s Administrator console
and choosing Tools from the Database pull-down menu to display the Tools screen.
Choose the File Watch Log and click View. The transfer is working if you see an en-
try that includes the date, time, and IMPORTING: shadow.log.machine1. The transfer
should occur every hour. Once you see an entry, reporting information will be available
one hour after the timestamp of the import listing.