


Quick Installation GuideCheetahSwitch Workgroup-2027
8 9
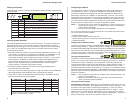
If this is your first time to log into the configuration program, then the default
password will still be null. Just enter a carriage return for the "Login" and
"Password" fields to open the Main Menu as shown below.
ACCTON CheetahSwitch Workgroup-2027 V1.00 05-04-97
Main Menu
---------
Port Configuration ...
Password Configuration ...
Restart System
Factory Reset
Exit
Configure port setting.
<Enter> to confirm.
Note: Input options for the currently selected item are displayed in the highlighted
area at the bottom of the console screen.
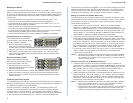
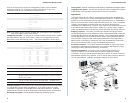
Configuring the Ports
- You can use the console program to quickly view or modify
the configuration of any port on the switch. Select "Port Configuration" from the
Main Menu to open the following screen. (The system defaults are shown below.)
ACCTON CheetahSwitch Workgroup-2027 V1.00 05-04-97
Port Configuration
====================================
Back to Previous Menu
Port Enabled Duplex Fwd Mode
=============================================
1 YES Half St&Fwd
2 YES Half St&Fwd
3 YES Half St&Fwd
4 YES Half St&Fwd
5 YES Half St&Fwd
6 YES Half St&Fwd
7 YES Half St&Fwd
8 YES Half St&Fwd
9 YES Half St&Fwd
Next Page
Back to previous menu.
<Enter> to confirm, <Ctrl+Z> to back to Main Menu
The functions provided by this screen are summarized in the following table:
Field Description
Enabled Allows you to disable a port due to abnormal behavior (e.g., excessive collisions),
and then re-enable it after the problem has been resolved. You may also disable a
port for security reasons.
Duplex Ports 1 - 25 support full duplex and half duplex. (The default is Half.)
Ports 26 - 27 support auto-negotiation, full and half duplex. (The default is Auto.)
Fwd Mode Sets the forwarding method to cut-through (CT), or store and forward (St&Fwd).
Setting a Password - If the switch is not in a secure location such as a wiring closet,
you should define a user name and password. If you have not done so, select
"Password Configuration" from the Main Menu and enter a password. Note that
passwords can consist of up to 14 alphanumeric characters and are case sensitive.
Restarting the System - Use the Restart command to reboot the system.
Factory Reset - Use this command to restore factory defaults and reboot the system.
Logging Off the System - Use the Exit command to exit the configuration program
and terminate communications with the switch for the current session.
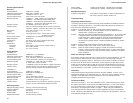
Applications
This switch segments your network, significantly increasing both bandwidth and
throughput. Any port on the switch can be attached to a hub (i.e., shared collision
domain) or provide a dedicated link to a single network device (e.g., a workstation).
When a port on the switch is connected to an Ethernet hub (i.e., a 10 or 100 Mbps
repeater), the bandwidth provided by that port is shared by all the devices
connected to the attached hub. However, when a port is connected to an end node
or to a device that breaks up the collision domain (e.g., another switch, bridge or
router), the attached device has access to the full bandwidth provided by that port.
Bridging Functions - This switch provides fully transparent bridging functions
which automatically learn node addresses, that are subsequently used to filter and
forward all traffic based on the destination address. When traffic passes between
devices attached to the same shared collision domain, those packets are filtered
from the switch. But when traffic must be passed between unique segments (i.e.,
different ports on the switch), a temporary link is set up between the switch ports
which need to pass this traffic (via high-bandwidth shared memory).
Switching Functions - The scheme used to forward traffic to other ports can be
configured to optimize system performance or to enhance data integrity by using
cut-through or store-and-forward switching, respectively.
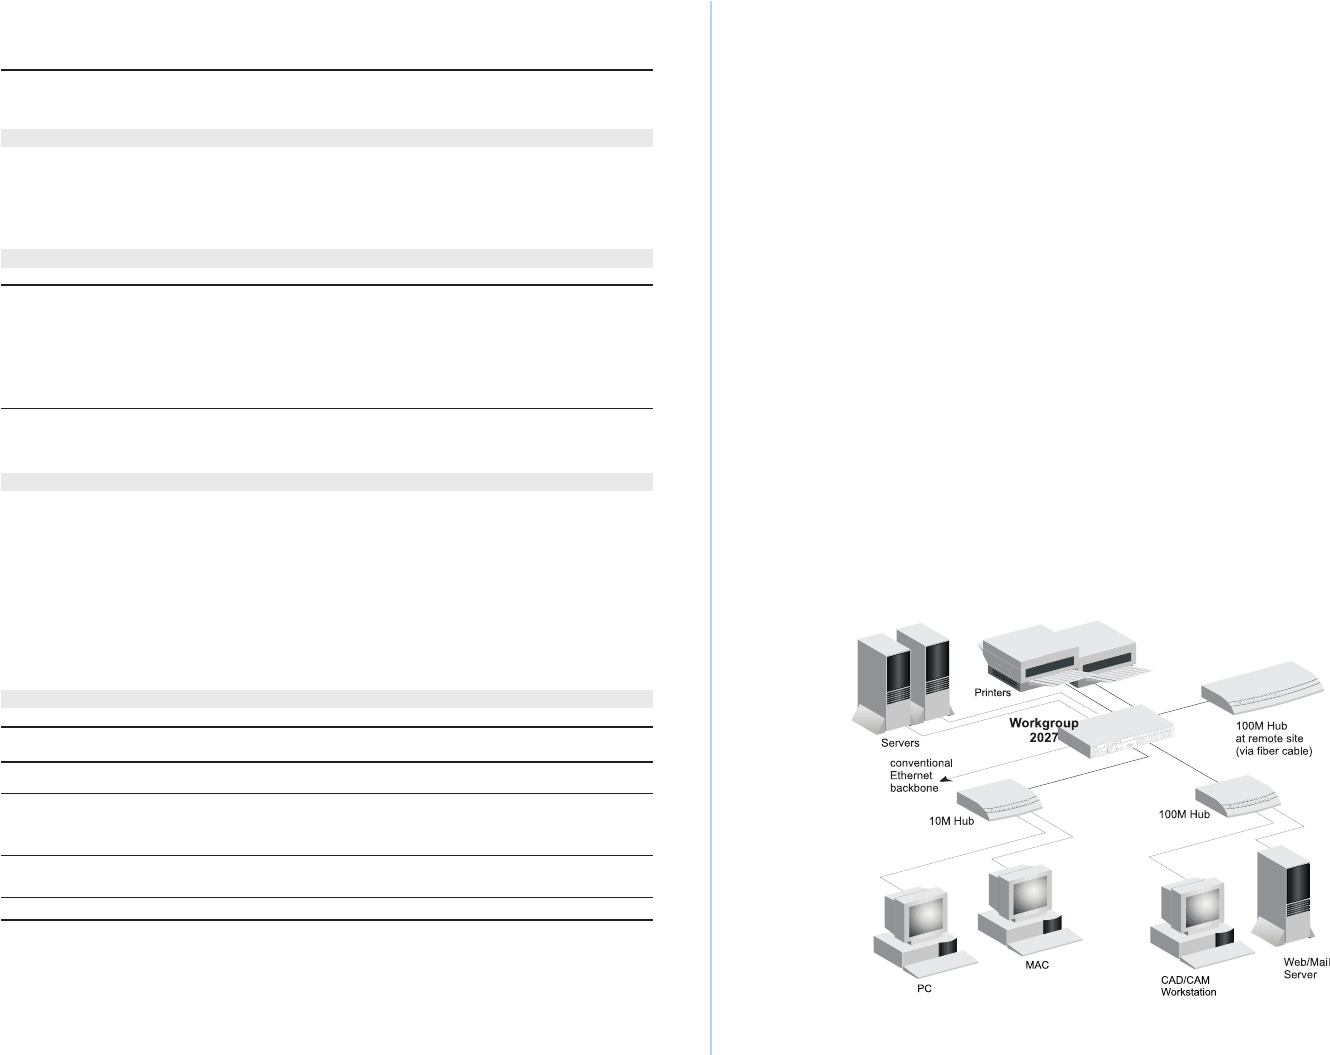
Flexible Configuration - This switch is not only designed to segment your
network, but also to provide a wide range of options in setting up network
connections. It can be used as a simple stand-alone switch; or can be connected
with standard repeater hubs, switches, or other network interconnection devices in
various configurations. A sample configuration diagram is shown below.