


58
Some applications, such as Gmail and Calendar, have their own
synchronization settings. Open the application and tap the
Menu
button (four bars) and then tap Accounts.
Auto-sync
To have your tablet auto-sync, make sure Background data and Auto-sync are
enabled.
•If
Background data
is enabled, applications can transmit and receive
data when you are not using them.
•If
Auto-sync
is enabled, all changes are automatically transferred
between your tablet and Internet accounts.
Acer Sync
Acer Sync allows you to easily synchronize your contacts, calendar, photos and
videos between your tablet, PC and corresponding Google services. You must
install the Acer Sync program on your computer; download and install Acer
Sync and Acer PIM for the PC from the mobile.acer.com website.
Multiple Google accounts
If you have multiple Google accounts, such as separate accounts for personal
and business contacts, you can access and synchonize them from the Accounts
settings section. Tap Apps > Settings > Accounts & sync. Tap Add account in the
top-right corner and select Google.
Setting the date and time
To set the date and time, tap Apps > Settings > Date & time.
Tip: If you travel frequently or live in an area that uses daylight saving time,
and have mobile network access, activate Automatic date & time from this
menu. Your tablet will set the date and time based on information it
receives from the network.
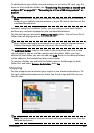
Setting alarms
There are two predefined alarms on your tablet by default. To add or edit
alarm settings, tap Clock in the application menu and tap Set alarm.
Tap A
dd alarm to create a new alarm, or tap the check box next to a preset
alarm to turn it on or off.
Tap a preset alarm to edit it. You can:
• Turn the alarm on or off.
• Set the alarm time.
• Set which days to repeat the alarm.
• Set a ringtone.
• Enable or disable vibrate.
• Give it a label (i.e. a name).